hidden button movable joint

I thought I’d show you how I do the hip joints since people commented on them. First of all though, I have to give credit. I learned this technique from a Judi Ward pattern. Judi Ward’s patterns are about the best way to learn dollmaking that I’ve come across. Her directions are clear, the pieces fit together, she invents techniques that are so useful, they become part of your design thinking. I would highly recommend her patterns as a learning tool, although she also teaches online classes, another excellent way to learn new skills. I think her babies are especially endearing. Here is a doll I made from her Emma Rose pattern. **Disclaimer- this is my way of doing this technique- it might not be exactly the way Judi described it originally, but how it works for me.

I’ve got the legs lined up, ready to finish. They are sewn and mostly stuffed with an opening at the top. The buttons used are the metal shank buttons – the kind you can cover with cloth, but not for this project. I buy them online from Joanns, because I can never find them locally when I need them. And, I like to have them on hand. You can use either the flat or domed style. I usually use 7/8 inch or 1 1/8 inch size.
311step1.jpg

-Snap the 2 parts of the button together- the top and the back. Slip the button into the opening at the top of the leg and safety pin into place. I don’t worry about the direction of the shank when I pin it- it can shift around a bit. The green legs on the right show the finished leg with the button sewed inside.
311step2.jpg

-finish stuffing around the button/hip area and sew shut. I use a ladder stitch to close the leg.

311step4.jpg

-I use nylon upholstery thread to make this hip joint- it is super strong and is available at my local sewing stores. I’ve switched doll legs here, because the thread shows up better on the green. Measure off a long piece of thread- at least 36″. Double it up (I cut it into 2 pieces at this point) and stitch through the shank of the button. Center the thread and then stitch around the shank one more time. Even up the 4 ends of the thread. I am using a doll needle here- it is about 3 inches long.
311step5.jpg

-Take the four ends and thread them through the eye of the needle-

311step6.jpg

-Pull the 4 threads through the hip.
311step7.jpg

-Remove 2 of the 4 threads from the needle. Stitch through the shank. Unthread the needle and rethread with the other 2 ends. Sew through the shank going in the opposite direction. Hopefully the picture makes it clear.
311step8.jpg

-Take one set of threads in each hand. Pinch the hip area as you pull to tighten up the threads. Yes, I know, sounds like you need 3 hands- try pinch, then pull, pinch and pull again.

311step9.jpg

Now this is the really hard part because I couldn’t take a photo! Pull the threads tight. This is one of the reasons you wanted a long piece to start with- you might want to wrap the thread around your hand for leverage. When you think it is tight enough, wrap one side of thread around the joint once or twice and then tie a solid knot. Clip off the excess thread, leaving about an inch. I usually just leave it like that, although I suppose you could sew it back into the body where the thread came out at the hip.
311stepagain.jpg

If you get it right, and it is usually a matter of getting the thread tied tight enough, your doll should be able to sit up, very nicely, all by itself. It takes me 2 tries about half the time.
311step10.jpg

In case you can’t figure out what the heck I’m trying to say, I found another description of this technique here.

make a make do pin cushion

I wrote up this article for my doll club’s newsletter, so I thought I might as well put it up here too.

make do 1

make do 2

close-up

make do 3

materials-

-cups, glasses, anything with an opening to put a pin cushion in or a shaft to put a pin cushion around.
-wool fabric
-embroidery threads
-wool for stuffing

I have had fun making pin cushions by recycling chipped and broken decorative glasses. I have used crystal and pressed glass, wine glasses, ice cream glasses and parfait glasses. I have been using ones that I found at my parents’ house when we were clearing out, and now I keep an eye out for anything special at Yard Sales.

The first one I made was inspired by my daughter. When we picked her up at the end of her first year at college, she handed me a broken wine glass – just a stem with some jagged glass of the bowl. She said to me “I kept it for you mom. I knew you’d want to do something with it!” She knows me so well!

My pin cushions have all been essentially the same- a fabric ball sitting in or on top of and enclosing part of the recycled object. I looked at other peoples’ work on the internet and this is the most common design. I have used wool fabrics for mine. I like wool for several reasons- firstly, I have a ton of it, secondly it has a nice “country” look, and thirdly it seems to hold up well to sticking pins in it all the time. I have not had such good luck when I have used tightly woven cottons, velvets or velveteen’s. The fabric seems to disintegrate sooner then I’d like.

illus a

CAUTION- MATH AHEAD! Two easy shapes for making the pin cushions are triangles (or diamonds which are just 2 triangles put together) and a half circle which make a strawberry shape. You need to know the measurement for the circumference of the ball you will make. If you are making an “over a stem” pincushion, that measuement can be approximate. If you are making an “in a glass” make-do, you will need to measure the top edge of your glass.

illus b

To figure out what size to cut your shapes- For Triangles- the pin cushion will be 4 triangles around. Divide your circumference measurement by 4. That measurement is the size of each of the 3 sides of your triangle. For strawberry- The circumference measurement is the length of the curved edge of the half circle. Don’t forget to add seam allowance to your pattern pieces.

illus c

Putting the pin cushion together-
for all pincushions- Sew up the seams. Stuff firmly. Decorate with embroidery or appliques if you’d like. I put some cut-out leaves around some of mine to make them look like flowers. I also stitch a small second pincushion on the top as a place to hold my needles. It looks like a cherry on top!

When I used the broken glass, I wrapped the broken top of the glass with some quilt batting so I would not cut myself and the sharp edges would not cut the fabric. When doing an “over a stem” make-do, you will have to leave the bottom open enough to fit in your base. The ball or strawbery is gather up around the base with strong (nylon) thread and tied as firmly as possible. You can put a ribbon or something to hide your stitches.

To attach the “in a glass” make-dos, I used Goop glue and pushed the pin cushion into the opening as firmly as possible. I then clamped it by using many rubber bands and string to hold everything in place until the glue
dried.

illus d

Update 7/09- this post has been getting a lot of traffic lately-  Thanks for visiting! I have written up and am selling a pattern for a make-do pin cushion here on Etsy.

little red ridinghood

Little Red Ridinghood is done-

red ridinghood

her face-

face6

and body applique-

torso

When I was in New York a few weeks ago, I went to Purl Patchwork. While I was browsing around and drooling on the Liberty of London fabric, the sales person was talking to someone who must have been a beginning quilter. She was showing her how to cut curves and sew them together and then got onto applique. I was listening to it all- not much of a challenge since the store is tiny. She described an applique technique that I’d never heard of before- so obvious and yet brilliant! I don’t think the person she was talking to understood what she was trying to describe, but I got really excited! I just did a 2 minute Google search to see if I could find a good description, but could not so I’ll try to explain.

You have your chosen fabric and then something like a very light not iron-on interfacing for backing. I had some used dryer sheets and thats what I used- they worked perfectly. You put your fabric face down on the backing. You sew the outline of your shape. Clip the curves and trim the seam. Cut a slit in the backing. Turn the little shape right-side out. Now, all your edges are turned in for you- iron it flat. Sew the shape in place.

I knew I had to try it and I did on this doll- on her basket, arms and the lower edge of her hood. It works beautifully. Thanks, whoever it was at Purl Patchwork that day!

back…

in body anyway… I am recovering from a week of running around. It always takes me some time to get back to work.

Right before I left for New York I ended up doing a quick project that I was really pleased with. I needed a bag to hold all my neccessary junk for the train. I found a bag that was just right, but it was a conference giveaway- my husband gets a lot of these. It had the name of the conference and the date in big, bright white letters stamped across the front. I tried painting over them with black acrylic paint- that didn’t work at all. And, then the bag looked worse. So, I did a total cover-up.

bag

I found a piece of fabric I liked and cut it to cover the front. I cut out and ironed on some “Wonder-Under” -(2 sided iron-on adhesive) so that the adhesive was about 1/2 inch from the edge of the fabric. Oh, and also, I ironed down the edges about 1/2 inch- no raw edges showing. Then I ironed it in place onto the bag. Next, I put a little glue around the edge (I could have skipped this step if I was more careful in cutting and planning the wonder-under. Last, I stitched all the way around. Then, pack it up and off to NY!

tools and techniques

I’ve been thinking for a long time that I want to put up a free pattern on my blog. Then, I get overwhelmed at the idea. So, I’ve decided to try doing it in baby steps. First I will post about the tools I use. Let’s see how far I get with this- ha!

The first tool is my camera- I just got a new one, a Canon A610. So far I am very happy with it. I had a Nikon 5400 before and was never able to get it to take photos the way I wanted- I thought I was inept until I read all the reviews on Amazon and realized a lot of other people had the same focus issues that I did- phew. This new camera makes this project seem a lot more doable.

This is my light box- my newest favorite tool-

light box

it is one of the many things I picked up from my parents house in the big clear out. It is an old x-ray viewing unit. I use it to make patterns which always seem to involve a lot of tracing. And here is what I am often tracing onto- freezer paper-

freezer paper

This is an old roll that I also got from the parents house, but it is available in supermarkets in the US. I have heard it is called deli paper in other parts of the world. It is paper on one side and plastic on the other.

What I love about freezer paper-
-It sticks to your fabric by ironing it on- Any fabric from bulky felted sweaters to slippery light silky stuff.
-You don’t have to worry about seam allowances.
-You can reuse the same piece several times- I usually ruin the paper before it gets to the point where it won’t stick to the fabric anymore.
-It is cheap so it’s not precious.

sewing

Freezer paper saves a lot of frustration from patterns slipping around. I always use it for my wool dolls. The photo of the hands show another tool I use a lot- the darning foot for my sewing machine. When I make the hands for my wool dolls, I do a free-motion embroidered outline on the machine. Then cut close to the stitching, around the edge.

hand

That’s all for today- any questions?

Washing my lace…

I searched Google for advice on washing all the lace I got. I thought about all the different advise and then this is what I did:
I use 2 cleaning agents- Neutrogena soap (the orange bar) and Oxy-wash type non- chlorine bleach (there are lots of brands and they all seem to say “Oxy” in the name). I used a quart jar with a lid as my mini washing machine.
Step 1-washing: I put a very small amount of oxy-wash into the jar- maybe about 1 teaspoon. I ran hot water into the jar, over the bar of soap, so the water got some soap in it. I then put some of the lace into the jar, put the lid on and gave it all a good shake.

lace wash

I let it sit for about half an hour and then scooped all the lace out of the jar and rinsed it. I examined each piece- some of it was all clean and nice, some still looked dingy or had spots. I put my jar of washing solution into the microwave and warmed it up again, and put all the rejects back into the jar to soak longer. I soaked the dirtiest pieces for a maximum of overnight. If they weren’t clean after that, I figured I could deal with it.
The clean pieces moved on to the next stage.
Step 2- drying: I collected glass jars (plastic didn’t work as well) and took off the paper labels. Take the lace and smooth it onto the glass. It will sort of stick if the lace is wet enough. The idea is that by flattening and smoothing it onto the glass, you can shape it and it will not need to be ironed. Here is one batch on glass-
wet lace

next I wrapped a piece of old Tshirt around everything to keep it in place while it dried. Lots of rubber bands were used…

lace wrapped

unwrap it when everything is dry…

lace dry
and voila!

lace done

Step 3-storing: I wasn’t sure what to do with all my lace once it was so clean and nice, so I asked people over on my favorite Yahoo group- Vintage Clothmaking. Someone said that she stored hers in plastic bags so she could handle it without getting it dirty. She puts similar types of lace (ie- tatting, tiny lace, etc) together. I thought that was a great idea- I have a box of ziplock bags that were too small for what I bought them for but are just perfect for the lace.
This is one of my favorite things in my haul- a collar with someones name inked onto it.
mary collar

recycle bag bag

basket.jpg

Here is where I am… it is a good project to travel with. It doesn’t wrinkle and is a nuetral and fun topic of conversation.
I am thinking it will be a trash container for my studio… basket type.
Thoughts and observations about this recyled bag (basket) project-
-I am using an I size crochet hook.
-It takes an entire cut up grocery store size bag to do ONE row!
-I prefer to work with bags of similar weight.
-I am going to run out of bags before I finish this.
Thoughts and observations about crochet recycled bag projects in general-
Variables-
-weight and texture of the bags
-color
-size of the bags
-how wide you cut the strips
-number of stitches around the project
Determining patterns-
-length of strip
-color of strip
-the order in which you put them together
-number of stitches around the project
so…
-you can make horizontal stripes- easy, just connect a lot of the same color as you go around.
-vertical stripes- figure out how many stitches you can make per loop, have your total stitches divisible by that number so that the same colors pile on top of each other as you go around. You connect the loops together, alternating colors.
-By alternating colors, you can also make diagonal stripes- determined by the total number of stitches it takes to go around.
-you could have different size vertical stripes on the same project by using big bags (big loops) and small bag loops.
-If you have lots of bags of different sizes and a few different colors, you could make bulging undulating vertical stripes!
and then there is texture, but I’m not thinking about that…

Doll Bases

This is an article I wrote for our doll club’s newsletter.

How I Make My Doll Bases

by Mimi Kirchner

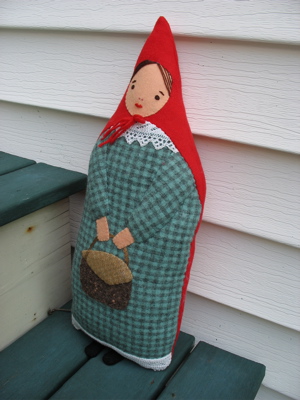
I make dolls that do not stand on their own and are not posed. They just stand around and hopefully look pretty! When I send them out to a show, they need a stand for display, and I learned early on that the white stands that are available at the local Arts and Crafts store would not cut it. I have figured out that I can still buy my “cheapo” doll stands- I just have to dress them up.

Materials needed for doll stand project-

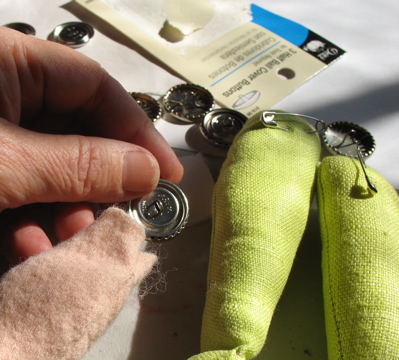
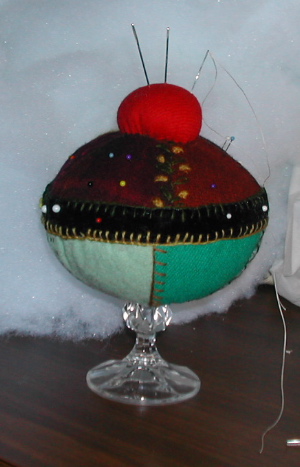
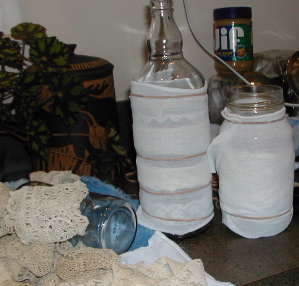
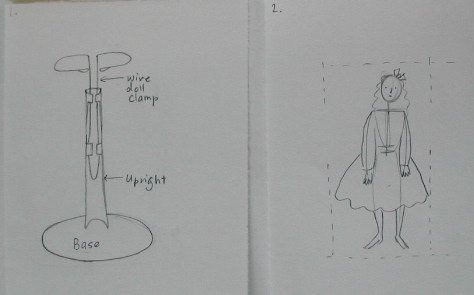
-1 commercially available doll stand in a size that will hold your doll. (illus. 1)
-a piece of foam core board- approx. 12” x 12” will probably be enough.
* note- I get free foam core and matt board scraps by asking at frame shops.
Tacky-Glue (or your favorite thick glue)
Fabric for top of stand- see ideas at the end
fabric for bottom of stand- “
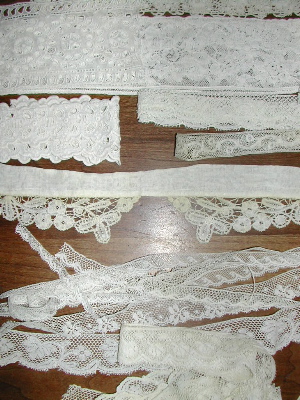
decorative edging (optional)- “
Quilt batting- (optional)
cardboard pieces
black knit fabric- approx. 2” x 12” ( may have to be bigger depending on the size of your doll and how much of the stand will show)
Clamps- I use clothes pins, bull dog clamps from Staples, hair clips and spring clamps, depending on the job.
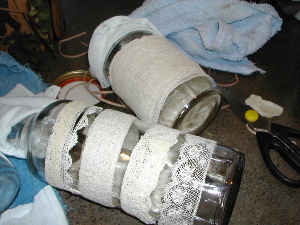
1. and 2.
pic1.jpg

Planning

1. Set your doll on the stand.
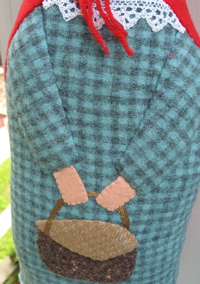
2. Consider your fabrics by placing choices under the doll’s feet. It is important that the fabric does not blend in with the feet and make them disappear!
In choosing a material, think about where you imagine your doll to be- in the kitchen?- tiles or linoleum, in the study- how about an oriental rug pattern. School- tile or cork(?), playground- grass or leaves. At the ball- parquet. And, how will the color and textures you use enhance your doll.
3. How big do you want your base?-
-The most important thing is that the doll is stable on it’s base- not at all tippy- even if tippy is the “look” you want.
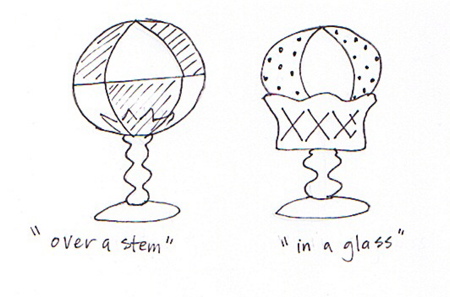
-The base can define a bottom for an imaginary case around the doll. Think about how the doll would look if the walls actually were there. crowded and cramped?- too small. lost?- too big. (illus. 2)
-a tall, thin adult doll will look better on a smaller base then a shorter rounder child doll.
-The doll’s base is equivalent to a painting’s frame- it defines the place where the piece exists. Make sure your doll has a big enough space.
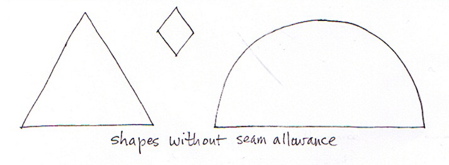
Some shape ideas-
formal look-
square with rounded corners
flat back, round front

less formal look-
oval
rectangle with rounded corners

Assembling

1. Remove the wire doll clamp from the stand and set aside. (there are other doll stands that have a removable upright shaft – take that off also)
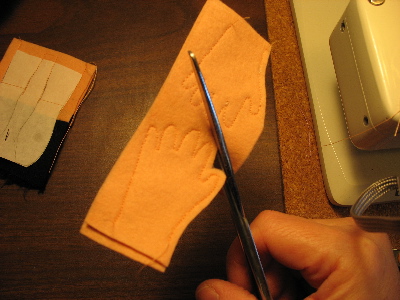
2. Make a paper pattern to cut the hole in the fabric for the upright in your doll stand. (illus. 4)
-Lay a piece of paper under the base and trace and then cut out the circle.
-Lay the paper circle on top of the base. Fold back where the paper touches the upright. -Mark where the metal touches your paper. (A.)
-Move your paper to the back of the base and measure from the edge of the base to the edge of the upright. (B.)
-Your pattern should look like this (C.)-
Try to approximate the shape of the bottom of the upright as you connect the dots. (D.) Cut along your drawn line and try it onto the base. It should fit very closely. If it doesn’t, scotch tape over your cut and try again.
-Put the paper aside for now.

4. and 5.
pic2.jpg

3.Cut out your foam core to desired size and shape. To make nice curves, use things you have around the house- bowls and plates, for instance.
*how I make an oval-
traced 2 circles and straight lines to attach them.
4. Put a ring of glue around the bottom edge of your doll stand and place it on the foam core. In most cases your doll stand is placed so that it touches the middle of the back edge. (illus. 5)
5. (optional) Cut out a piece of quilt batting- I use a 1” thick poly- the same size as the foam core. I like the cushiony look this gives. It hides all evidence of the original base, especially if you are using a light material or paper. Cut a whole for the upright and slip it on.
6. Cut your top material so that you have AT LEAST 1” (2” is safer) larger then your foam core.
-Keeping in mind your extra fabric allowance, put your paper pattern onto the fabric and mark where your U-shaped cut will be. Do NOT cut in from the edge! Cut ONLY the U-shape. The less you cut, the neater the base will be. It is better to stretch your cut over the upright or to go back and make another clip then to cut it too big. Slip your top material over the upright and into place.
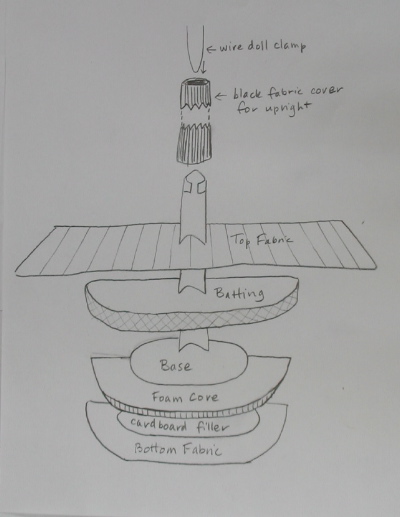
you now have-
________ top material
______ batting
___ base
______ foam core

7. Turn the base over and lay on the edge of a table so that the upright is pointing down, and the main part of the project is supported on the table.
You will now be gluing the fabric onto the bottom of the foam core. Put a line of glue around the edge about 1/2” in from the edge.
First fold down the largest areas you can- the straight line areas, if there are any. Then carefully clip and stick down the curved areas. Clamp as you go along. You will have to clip a lot of the fabric to make smooth curves. It is best if the fabric does not overlap because you will end up with a lumpy bottom on your base.
It is a good idea to protect the top fabric when you clamp- put something stiff between the fabric and the clamp- like a popsicle stick or stiff cardboard pieces.
Let everything dry before the next step.
*note- at some point you may have to put a dot of glue at the base of the upright if your cut-out flap just won’t stay down.
8. If you are going to put piping on the edge, glue it on now.
I often put a piece of cardboard into the center space created by gluing down the top fabric. This evens out the bottom- no dip in the center.
9. Choose your bottom material and cut to the size of your base. (no matter how carefully I try to do this step, I always end up having to do a little trimming after it is glued and dried- so be warned!) It is most important that the edges are securely glued. I put a line of glue about 1/4” in from the edge and then spread it toward the edge with a scrap of cardboard. Place your base onto the fabric. Fiddle until it is just right and then weight the whole thing with some heavy books until it is dry.
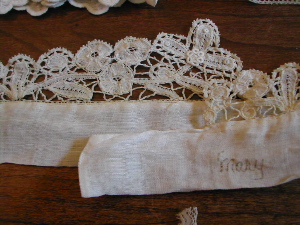
10. finishing the edge- I like to cover the place where the top fabric meets the bottom fabric. I have used upholstery edgings and piping, ribbon and artificial flowers, flower petals, and leaves. Glue them on and pin in place until they are dry.
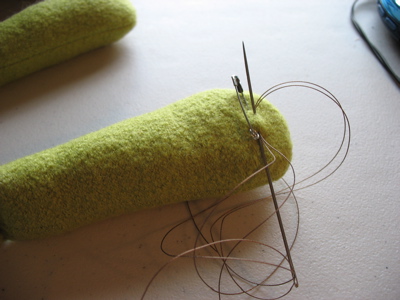
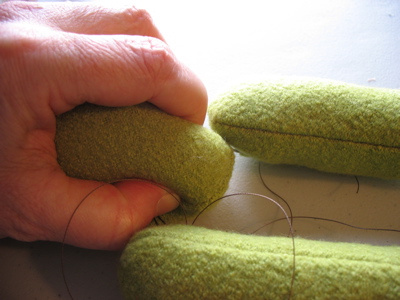
11. Take the piece of black knit fabric and sew up the long edge to form a tube. Turn. Slip the tube over the upright piece.
12. Now, put it all together! Push the black fabric tube down toward the bottom of the upright and put the wire doll clamp back into place. Put your doll into it’s new “home”. Adjust the height of the wire holder. When the doll is just where you want it, put some tape at the place where the wire goes into the upright. This will keep it from slipping around. Pull the black fabric sleeve back up to cover the upright. You are done!

stack2.jpg

Some material ideas for top fabrics-
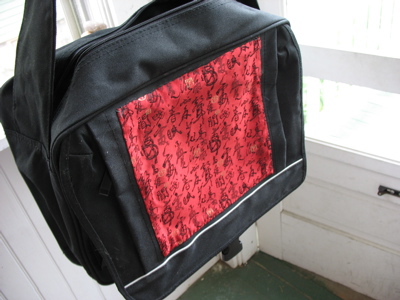
-Upholstery fabrics
-artist canvas- you can paint it any way you like
-ultra-suede
-cork sheeting
-“grass” paper used for model railroad setups. If it is shedding like mine was, paint it with clear acrylic or modge-podge
-rice paper
-wood veneer
doll house supply papers- can look like grass, wood, tile, carpet etc.!

Materials for bottom of base
-felt
-cork sheeting
-ultra suede
-matt board

finish edging
-ribbon- velvet looks very nice
upholstery edging
-any piping
-fabric or silk flowers, leaves or petals

she’s got hair

wigcap.jpg

Miss gourd head doll has her hair now. I tried something new, inspired by some info on wig-making at Susan Doyon’s site. I often use wool felt to make a wig cap… Edinburgh Imports carries it in nice hair colors. Usually I make a paper pattern and then use it to cut out the felt. This is what I did this time-

I measured the head- ear to ear across the top of the head and again across the back. This gives 2 measurements- in this case 6″ and 8″. I use these numbers to cut out a rectange- 6″ X 8″.
I wet the wool and squeezed the water out so it was damp, not drippy. I put a plastic bag on the dolls head and upper body. The bags was taped around the dolls neck to keep it from moving. The felt rectangle was placed on the head and the excess was pinched up into 4 darts with the clips. Easier said than done- the plastic bag made the head very slippery and since it is a gourd head, I couldn’t use pins. I ended up using rubberbands, which as you can see in the picture, I anchored in the front with tape.
Then wait for the felt to dry… by the next morning it was ready to go. I carefully cut off the flaps and sewed the darts closed.
This method made for a much better fitting wig cap and cut out one step (the paper pattern). This method also works for lambskin wigs, so I will try that next time I make one.

The yarn hair is sewed onto the wig cap and the wig is glued to the gourd.

And here she is with her new hair… it still needs cutting and fixing, but I’ll wait til she is dressed to do that.

hairon.jpg

—-