golden baby progress

tunic front

I’ve got the tunic done- hurrah! It fits!

tunic back

I am now making shoes and shaping the wig… i.e. the doll is sitting on my table with a purple sock pulled over his head- the sock is holding the damp wig in place while it dries. Hopefully this will make the wig fit better before I glue it in place.

I will be away for 4 days- it is unlikely that I will be able to post. I have a whole bag of projects to work on though- we’ll see if I have anything to post/show when I get back.

working hard today…

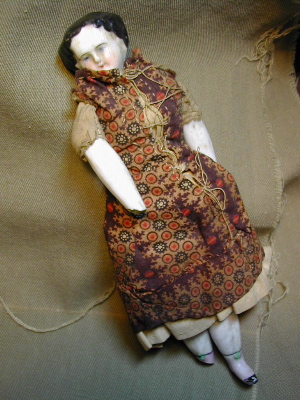
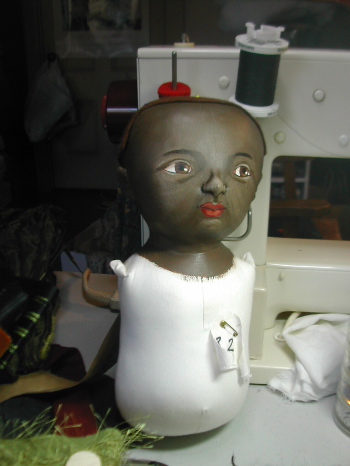
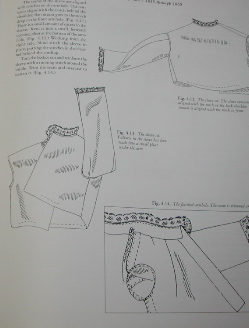
I spent the day working on the golden baby tunic. I used a pattern from Sewing Victorian Doll Clothes as a starting point. I’ve used this pattern before when I made the Godey lady. Here is a photo from the book-

9:20:plate.jpg

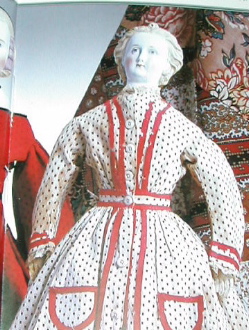
What I was wanting was the sleeve design. The victorian (and earlier) sleeves were a very different design from today. This curved sleeve was used in men and womens clothing.

9:20:pattern.jpg

I copied the pattern and adjusted it to fit my doll and made a muslin model. If I had been smarter, I would have read the directions through again… but that’s not how I do things. Also, I never really learned any sewing techniques beyond about intermediate level. When I dive into a project with linings and piping and slippery, sort of metallic fabrics, I am really in over my head. I worked really hard on the tunic today- lots of intense concentration, basting, backing up, ripping out stitches, and, when I started feeling too stressed, worked a few rows of knitting- Well- my knitting is coming along VERY well! HA!
Lots of the sewing is done by hand- because I can’t figure out how to do it by machine. The openings are too small or I just need the control of hand stitching.

9:20:needle.jpg

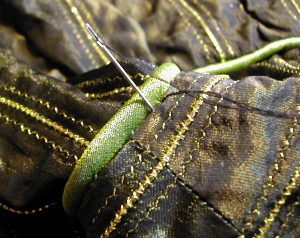
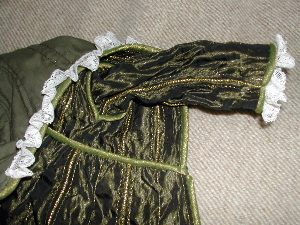
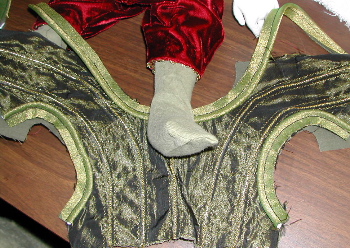
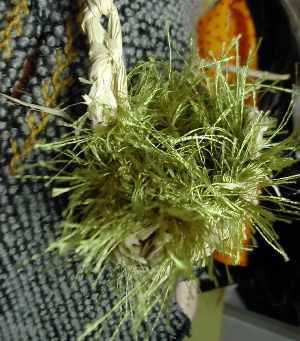
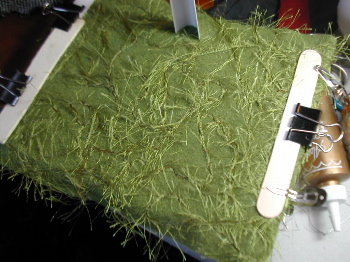
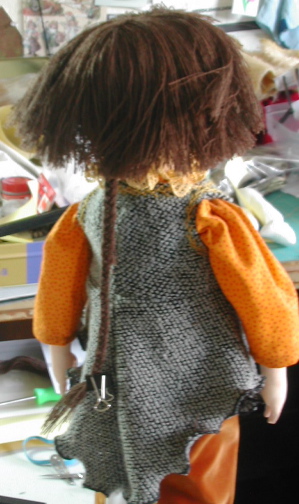
This is a photo of the inside at the armhole. If a real person had to wear this they wouldn’t be very happy about all the lumps in their armpits… that is one good thing about sewing for dolls- they wear what you make them and don’t complain.

9:20:inside.jpg

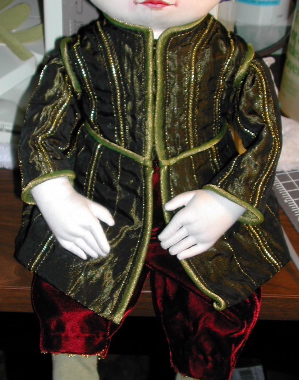
I have just about finished it now- I am sewing on the closures- hooks and eyes.
I’ll finish, photograph and post tomorrow. Right now my eyes and hands hurt.

clothes for golden baby

gbbaby clothes

Things are moving along! I made the bottoms- with a bit of gold rik-rak trim on the bottom edge. The tunic is in progress. The pieces are all cut, I made bias trim and have started putting it in place and some of the parts are stitched together. I did some decorative top-stitching in gold thread. So far I am very happy with how it’s going!

I have also started on my kitty bed project- did a swatch and made sure the yarn really felted this time. I am going to use some of the blue yarn I’ve got and have no desire to wear… it will be a very becoming color on my orange kitties.
I had to go to 4 stores to find large size double-pointed knitting needles! Geesh! I was looking for size 11’s, dp, at least 9″ long. I went to my favorite local art/craft store- Playtime, JoAnn’s, Michaels and finally Wild and Wooly in Lexington. They had 8″ size 11 in bamboo (which I don’t like), and they cost more then $11. I settled for aluminum 10.5, 10″ long for $4.75. I am trying to knit loosely “til I can switch over to my circular needles.

present!

9:15:gift.jpg

My neighbor, the one who is moving, gave me this little doll today. The doll is about 6″ tall. I will call the doll “Mary” after my neighbor. Mary thought the doll had belonged to her husband’s grandmother. I think she has a very serene expression.

9:15:dolls.jpg

Here is my progress so far on my 2 current babies… I worked on the tunic pattern and muslin all day today… when I wasn’t folding laundry … I made the green socks yesterday.

finishing up Sparrow and other stuff

9:5:egg.jpg

I have painted this wooden egg for Sparrow to carry

9:5:nest.jpg

in this nest/basket/purse thingy. I’ll see if I like it. The carrier is crocheted raffia on the outside and knitted furry yarn on the inside.
And I’m working on her doll stand- I sewed down some of the yarn onto green wool fabric. I love this green fabric- it was a $1 thrift shop, knit fabric jacket that I felted in the washing machine.

9:5:base.jpg

And this is the latest side track… I got distracted thinking about cornrows, locks, braids and how to make them on a doll, so I needed a head to work on… I did the painting before we left on our trip. Today I finished up the wig cap so I can start adding hair. I am experimenting with black wool roving.

9:5:bbaby.jpg

flying cape

8:13:c.jpg

I don’t make dolls that are posable, but I want to be able to display this doll with her arms up, showing her cape out-stretched. I am working on it…

8:13:d.jpg

I sewed a casing that runs along the arms and across the shoulders, on the underside of the cape. I went to the hardware store and bought some dowels, some brass tubing, and brass rods. I quickly decided the dowels were too stiff looking. The brass rod and tubing is more fun to work with. The brass rod fits tightly into the brass tube. I cut a small piece of the tubing- about 1 1/2″- and pushed it into the casing to the shoulder point. I put a rod up the casing, one from each side. The rods can slip into and out of the tube, so that the cape will be held out or down. Now I need to figure out a way to keep the tube in place and make an attachment so that the doll’s hands hold the edge of the cape.

Golden baby

8:13:a.jpg

I’ve got his arms and legs sewn on and am trying out this piece of Teddy bear mohair for his hair.

8:13:b.jpg

I have these postcards that I got some time ago that I am using for costume thoughts. The original inspiration for this baby was late medieval paintings of Madonna and child, at the Clark Art Institute in Williamstown, MA. Lots of gold, dark reds and olive greens.

the new wig

8:12:a.jpg

Here she is with her new ‘do. It kept getting shorter and shorter- I am definitely not going into hair-dressing as an on-the-side money maker. I like the messy look, but that is hard to keep. I am much happier with this new hair then with the tibetan skin wig.

8:12:b.jpg

I am thinking about this braid down her back…

coming up next

8:10:a.jpg

I have been working on these guys, bit by bit… as I do the fiddly bits on my bird girl doll. (Right now I am pressing down her center hair part- I have to wait ’til this dries before I go on and give her a haircut.) It is always a challenge for me to do a face that doesn’t resemble me or one of my children, but I have some ideas that need faces of other ethnic groups… so I’m working on it. The one in front is finished for now and I am working on arms and legs.

8:10:b.jpg

8:10:c.jpg

it’s a bird “girl”

wig1.jpg

I made a new wig while I was away. Sorry this picture is so bad… in this picture the wig is pinned on and has had a first trim. I will decide what to do for a hair-do when the wig is properly attatched to the head.

wig5.jpg

This is the wig off the head.

wig2.jpg

This is the inside of the wig right now. I was able to use some of the things I learned at my wig-making workshop that I took at WOW!- specifically around the bangs and part area.

wig03.jpg

This is a close-up of the part. I cut through the wig-cap and brought the yarn up from beneath so that the hair in the part would not have any stitches showing. I need to sew or glue a piece of fabric to the inside of the part to close it up again. It needs to be tightly closed to look right.

wig4.jpg

This is a close-up of how the pieces of yarn are attached. They are sewn on individually.
I used all wool felt for the wig cap and a very fine wool yarn for the hair.