Miss gourd head doll has her hair now. I tried something new, inspired by some info on wig-making at Susan Doyon’s site. I often use wool felt to make a wig cap… Edinburgh Imports carries it in nice hair colors. Usually I make a paper pattern and then use it to cut out the felt. This is what I did this time-
I measured the head- ear to ear across the top of the head and again across the back. This gives 2 measurements- in this case 6″ and 8″. I use these numbers to cut out a rectange- 6″ X 8″.
I wet the wool and squeezed the water out so it was damp, not drippy. I put a plastic bag on the dolls head and upper body. The bags was taped around the dolls neck to keep it from moving. The felt rectangle was placed on the head and the excess was pinched up into 4 darts with the clips. Easier said than done- the plastic bag made the head very slippery and since it is a gourd head, I couldn’t use pins. I ended up using rubberbands, which as you can see in the picture, I anchored in the front with tape.
Then wait for the felt to dry… by the next morning it was ready to go. I carefully cut off the flaps and sewed the darts closed.
This method made for a much better fitting wig cap and cut out one step (the paper pattern). This method also works for lambskin wigs, so I will try that next time I make one.
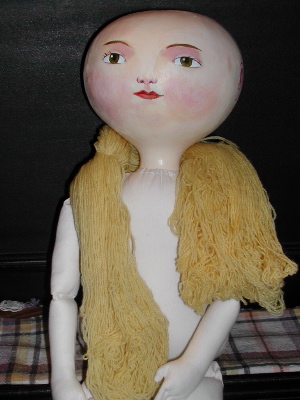
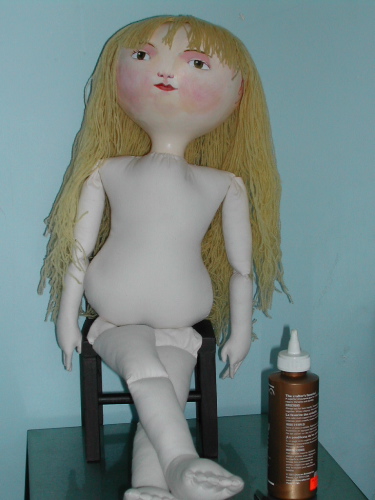
The yarn hair is sewed onto the wig cap and the wig is glued to the gourd.
And here she is with her new hair… it still needs cutting and fixing, but I’ll wait til she is dressed to do that.
—-