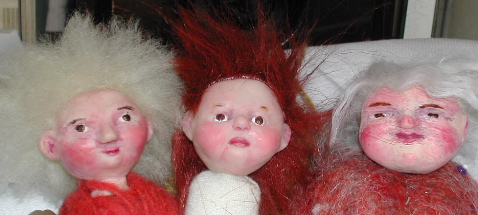
Here they are with their hair- I am still trying to figure out exactly who they are.

Here they are with their hair- I am still trying to figure out exactly who they are.
I’m going to NYC for fun, fabric shopping and doll ideas. I’ll be meeting my SIL there the week-end after next- 4/23. Last time I did a shopping trip to NY was 2 years ago and I used the Sewer’s Guide to New York, from Threads Magazine as a guide. Does anyone have any other suggestions? I would love to find out about any galleries that show dolls or anything close to dolls, great stores for beads and charms and other embellishments, and just general fun places… of course I’ll only be there for 2 days!
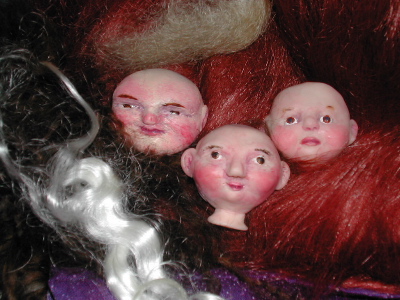
These heads are made of Fimo. We did a little workshop on sculpting heads at doll club. Now that the gourd head girl is almost finished, I am starting in on these guys. They are sitting on various possible hairs. We are suppose to bring finished dolls to doll club in June. It is fun to play with something completely different…

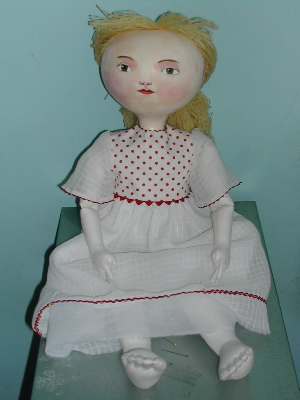
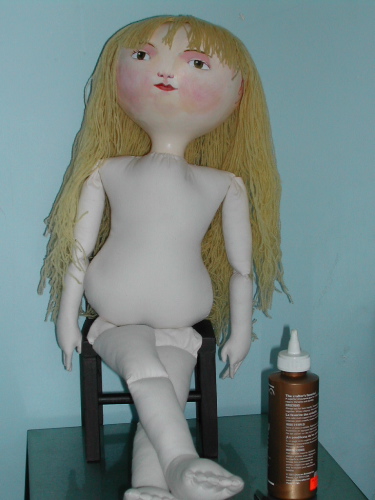
Her dress is finished, I bought baby socks for her, and the shoes are just about done. I just have to trim the straps, but will do that once they are on her feet. The underwear just needs elastic. So, now that she is just about done, I’ve decided that the white arms just won’t do… I need to paint them a flesh tone. I probably should do the legs too. This is not the order I usually do things! And she still needs a name.
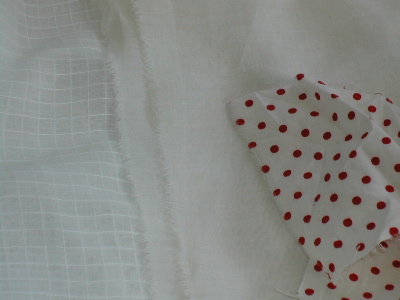
I love working with the old fabrics in my collection. They each have a bit of history that I think about as I use them.
The white windowpane comes from a badly damaged dress, found in the basement of the house in Woodstock- I aquired it during the clean out. It was probably from around 1900- the corset age. It has some stains and damage, but I am working around and ignoring them.
The stiff white fabric came from my Mom’s stash. It was a brown sort of color on the top layer of the roll. I put it through the washing machine and it is fine- it is a cotton “organza” (? I think). It is stiff without starch- good for a petticoat. The polkadots came from a bag of fabrics that my neighbor gave me when they did a clean out. Judging from other things in the bag it was probably from the 60’s or early 70’s.
I am working on a dress for the gourd head girl… inspired by memories of a dress I had as a child.
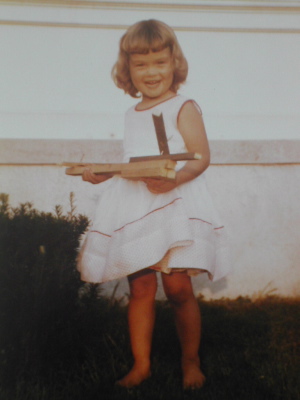
I am 4 in this picture- it’s my birthday and I am holding a gift from my brother Paul- it is a helicopter that he made and I am very pleased with it. What doesn’t show in the picture is the large cloth red rose at the waist of the dress, the dotted swiss fabric- red dots on a white background, and the memory of the textures of the dress.
Here she is, trying on the dress in progress.
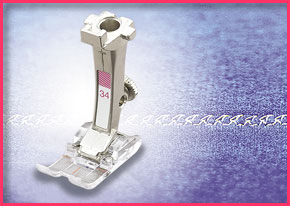
Well, I bought a machine with 24 presser feet, most of which I have no clue how to use, so obviously what I needed was another one! When I picked up my machine yesterday, I bought this one… at least I know how to use it!
Thanks to lots of helpful people, I’ve got the answer to my question. Of Course the answer was on the web… how could it not be? Someone from FOCD directed me to this Yahoo group-
BerninaThirtySomethings@yahoogroups.com
It is for people with older model Bernina’s. They have a list of all the feet with the old and new numbers. Now I just have to figure out how to use them.
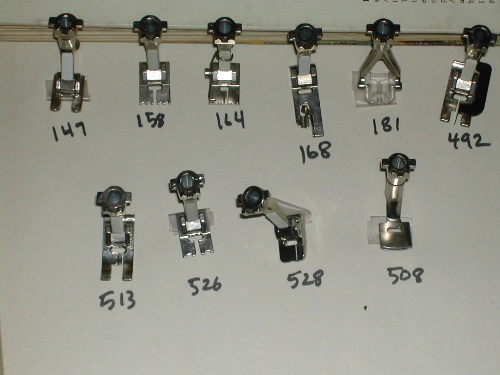
BIG EXCITEMENT! I bought a used 930 Bernina sewing machine today from Ann’s Fabric in Canton. I don’t have it home yet- they are doing the maintenance, but I have the manual and all the attachments. So, here’s the problem- it came with 24 different presser feet. I have identified many of them, but the bunch in the picture are a mystery. I tried looking on-line (of course), but couldn’t match up any of the numbers- have they changed them in the last 20 years? So what are these for and how do I figure out how to use them?
This is what I got with the machine-
000- standard foot
007- zipper
016- embroidery
145- jeans
147- ?
152- button
158- ?
164- ?
168- ?
181- ?
285- darning
419- tailor tack
452- buttonhole
470- overlock
492- ?
508- gather (?)
513- ?
526- ?
528- ?
560- ?
also a more complicated button hole contraption
a walking foot
and a ruffler
if you can help me with any of these, please post in the comments. Thanks!
Continue reading
I got home today and there was a letter for me from the Kansas City Doll Fair. It said-
Dear Mimi,
I am pleased to inform you that your competiton entry #87 has been awarded a Special Merit Award from Jones Publishing….
So I get a one year free subscription to Doll Crafter or Doll Costuming… big decisions! It’s been a great day!

Miss gourd head doll has her hair now. I tried something new, inspired by some info on wig-making at Susan Doyon’s site. I often use wool felt to make a wig cap… Edinburgh Imports carries it in nice hair colors. Usually I make a paper pattern and then use it to cut out the felt. This is what I did this time-
I measured the head- ear to ear across the top of the head and again across the back. This gives 2 measurements- in this case 6″ and 8″. I use these numbers to cut out a rectange- 6″ X 8″.
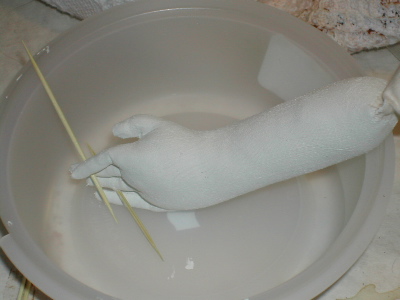
I wet the wool and squeezed the water out so it was damp, not drippy. I put a plastic bag on the dolls head and upper body. The bags was taped around the dolls neck to keep it from moving. The felt rectangle was placed on the head and the excess was pinched up into 4 darts with the clips. Easier said than done- the plastic bag made the head very slippery and since it is a gourd head, I couldn’t use pins. I ended up using rubberbands, which as you can see in the picture, I anchored in the front with tape.
Then wait for the felt to dry… by the next morning it was ready to go. I carefully cut off the flaps and sewed the darts closed.
This method made for a much better fitting wig cap and cut out one step (the paper pattern). This method also works for lambskin wigs, so I will try that next time I make one.
The yarn hair is sewed onto the wig cap and the wig is glued to the gourd.
And here she is with her new hair… it still needs cutting and fixing, but I’ll wait til she is dressed to do that.
—-
Miss gourd head doll has her hair now. I tried something new, inspired by some info on wig-making at Susan Doyon’s site. I often use wool felt to make a wig cap… Edinburgh Imports carries it in nice hair colors. Usually I make a paper pattern and then use it to cut out the felt. This is what I did this time-
I measured the head- ear to ear across the top of the head and again across the back. This gives 2 measurements- in this case 6″ and 8″. I use these numbers to cut out a rectange- 6″ X 8″.
I wet the wool and squeezed the water out so it was damp, not drippy. I put a plastic bag on the dolls head and upper body. The bags was taped around the dolls neck to keep it from moving. The felt rectangle was placed on the head and the excess was pinched up into 4 darts with the clips. Easier said than done- the plastic bag made the head very slippery and since it is a gourd head, I couldn’t use pins. I ended up using rubberbands, which as you can see in the picture, I anchored in the front with tape.
Then wait for the felt to dry… by the next morning it was ready to go. I carefully cut off the flaps and sewed the darts closed.
This method made for a much better fitting wig cap and cut out one step (the paper pattern). This method also works for lambskin wigs, so I will try that next time I make one.
The yarn hair is sewed onto the wig cap and the wig is glued to the gourd.
And here she is with her new hair… it still needs cutting and fixing, but I’ll wait til she is dressed to do that.
—-