
I love the aqua/light blue and silver luster around the edges. And the flower decorations remind me of old book illustrations.


I love the aqua/light blue and silver luster around the edges. And the flower decorations remind me of old book illustrations.
Again there is one made of wool knit (reclaimed sweaters) and one made of woven wool.


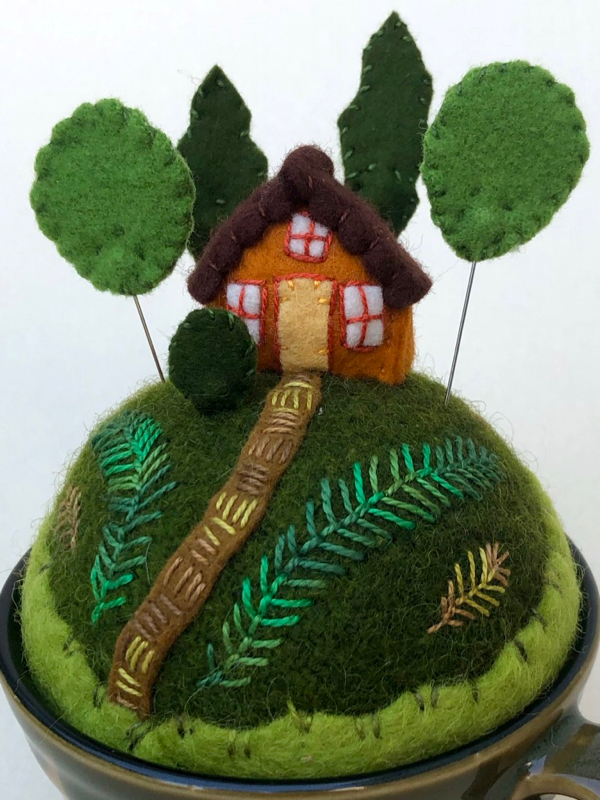
Lots of trees but no saucer on this one.
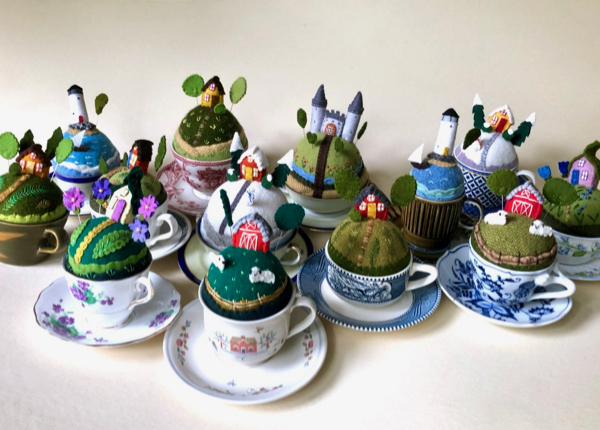
And here is a photo of almost all of them… somehow one got edged out of the photo!
I’m now busy listing these into my etsy shop, freezing peaches, making soup stock now that the weather has cooled, cleaning up my studio, trying to get everything back into my studio closet after my husband need to do a wiring project in there… it never ends!
Two lighthouses for the end of summer.

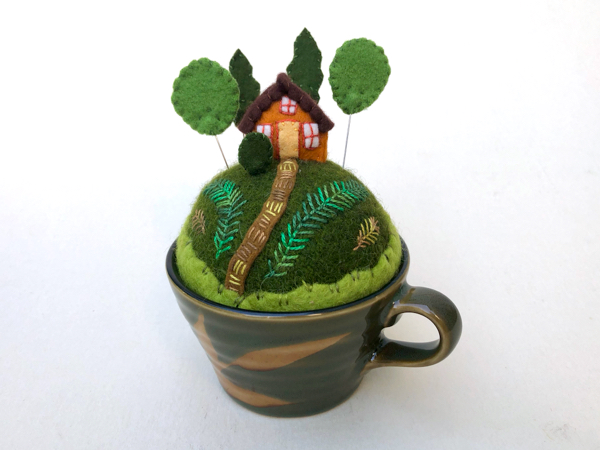
I bought a whole box of cups, saucers, and 2-handled cups (?) in the below style so there will be lots of future scene in them.

This cup and saucer make me think, rough seas ahead!

This is a story and a review of 2 irons, and the one I’m now using every day!

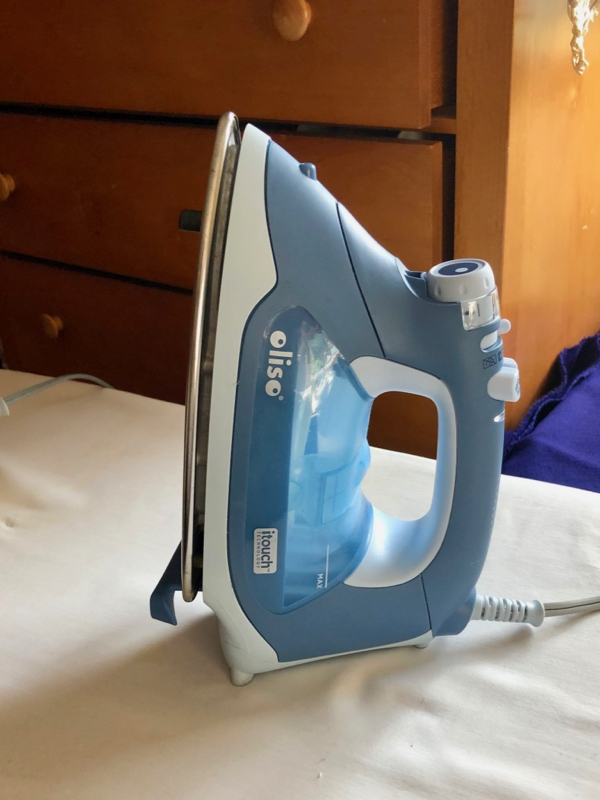
I use my iron a lot when I work and I’ve been unhappy with the last few irons I’ve bought. Some of my complaints included the iron taking a long time to warm up to temperature, having no indicator that it is at temperature, turning itself off very quickly, having a small water tank for steaming, controls in awkward positions (one iron I had would constantly turn off because the control was right where my hand went when I picked up the iron!)… I’m sure there were other things that I’ve very happily forgotten. I was contacted last winter by Oliso to ask if I’d be interested in trying out and reviewing their new mini iron. Of course I said yes! I had never actually heard of the brand so I went to check them out. The mini iron wasn’t going to be available for a month or so, so I checked out the full size irons. I was intrigued- Pretty colors and those funny feet!

Because I was already in the market for a better iron, I decided to spring for the TG1050 Smart Iron. I’ve been using it for 3 months now and I am so happy with it. If you want to see it in action, here is an excellent video review of the iron by Wendi Gratz and she points out all the features that I like too. She has a fancier model but everything she mentions is true on mine too. Every time I put my hand on the handle and those little feet go up, I get a silly thrill- and that is pretty amazing from an iron.
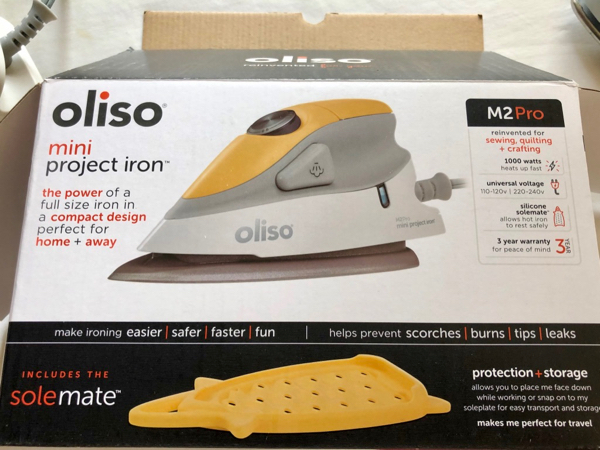
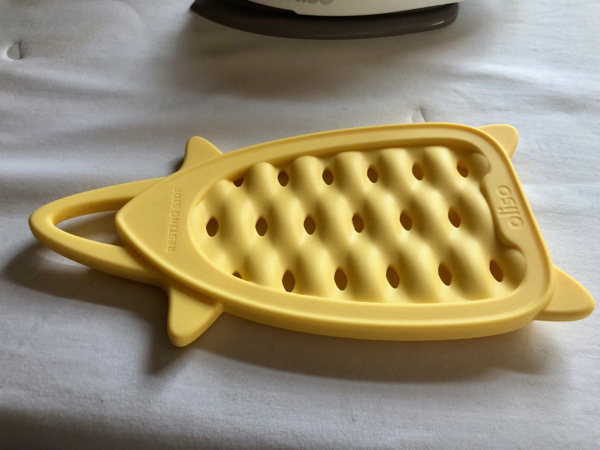
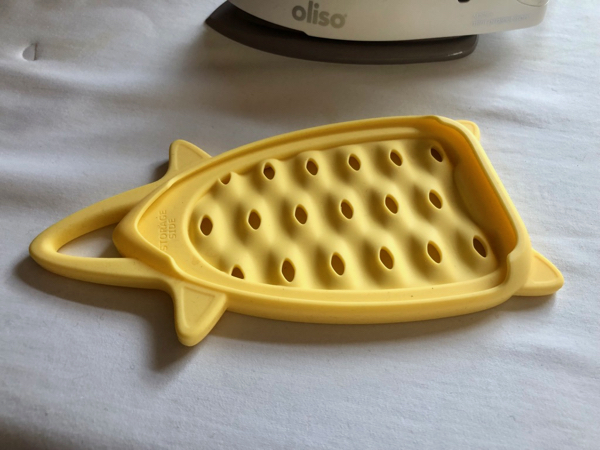
Now, about the mini iron. Eventually I received it and began using it in my studio. I’d already had my new full-size iron for a while at this point. My mini is a lovely yellow color and about half the size of a regular iron. It comes with a silicone rest to place it on when you are using it. The iron will not stand up like a classic iron in a rest position. The silicone plate rest turns over and it clips onto the iron for storage.
So what do I think about this cute mini iron? It turns out that this is not a tool I need every day in my studio. I will carry it when I travel though. I can see that it would be very useful when I unpack for shows and there are touch-ups that need to be done. It would also be excellent for travel teaching and if/when I take a class. Some of the reasons it is good for travel are the same as why I won’t be using it everyday in my studio.
-The water tank is very small so the water gets used up very quickly. This seems like a plus for traveling.
-The mini does not have an auto shut-off. It turns out I am very dependent on this feature. I scared myself because I accidentally left it on when an unexpected guest rang the doorbell and I forgot about it. This would not be an issue when using it in my show booth.
-It packs up compactly and the silicon rest snaps right on the ironing plate.
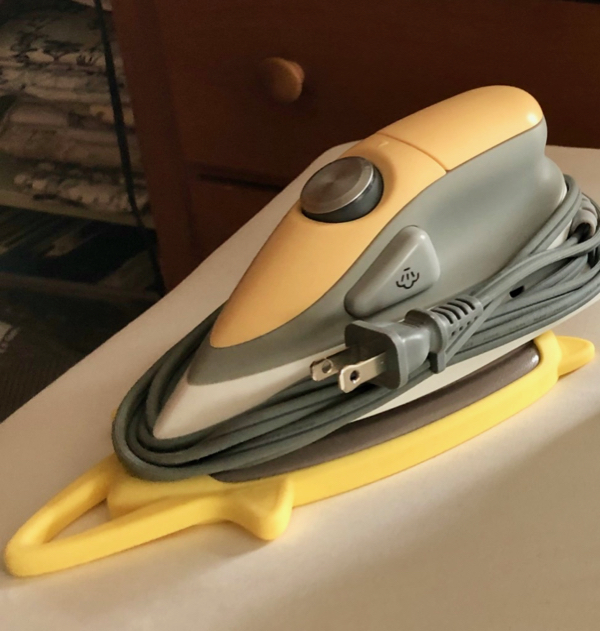
I think this little guy would be fine for someone who only occasionally uses an iron or, as I’ve noted, as a traveling iron. But, oh how I love my blue smart iron!
fyi- I got my Mini Iron for free to review, but I bought my Smart Iron at JoAnns. Just so you know, the “sale” price at JoAnns was the same price (or a little higher?) as “regular” price, direct from the website, which I didn’t realize when I was shopping.
Ask away if you have any questions. I wasn’t sure what exactly you would want to know!
After I posted some photos on Instagram of my booth at CraftBoston in December, I had a request to show more booth details so here it is!
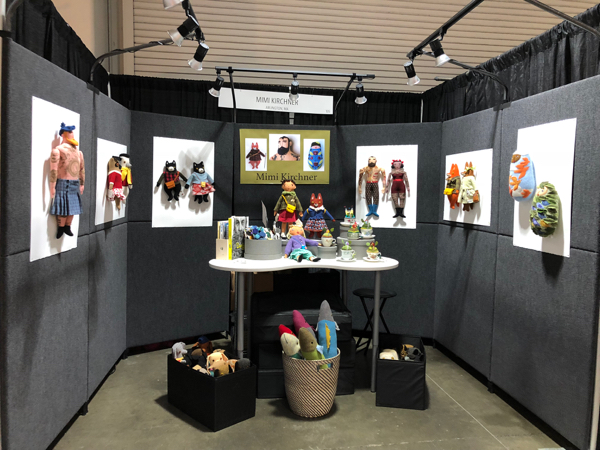
I have moved from doing Indie Craft Shows to Fine Craft Shows. There are lots of differences including the price of doing the show, the price of the items at the show, and the type of people who decide to walk through the door. The Fine Craft Shows need a different kind of booth than the Indie Shows: more of a gallery look is the aim. I don’t do very many shows per year so it might be a while before I get it perfected.
Doing CraftBoston was a good way to test since it is local and if I had a real disaster, I was close to home for emergency supplies. Since I knew that I’m doing 2 more shows that are not close to home in 2018, the December show was my trial run. I wanted a booth that I could conceivably set up myself (I hope I don’t have to!) and could be set up relatively quickly. I bought a booth set-up from ProPanels. That includes walls and lights. Most everything else in the booth is from Ikea.
Here are my 2 helpers, helping me set up. It took about 2 1/2 hours to get from unloading (I have one of these carts and it was invaluable) the car to this-

This is my Ikea table top with removable legs. I will be replacing it though because it is very heavy and got damaged during the last haul around. My little tiered stands are nesting boxes from Ikea.
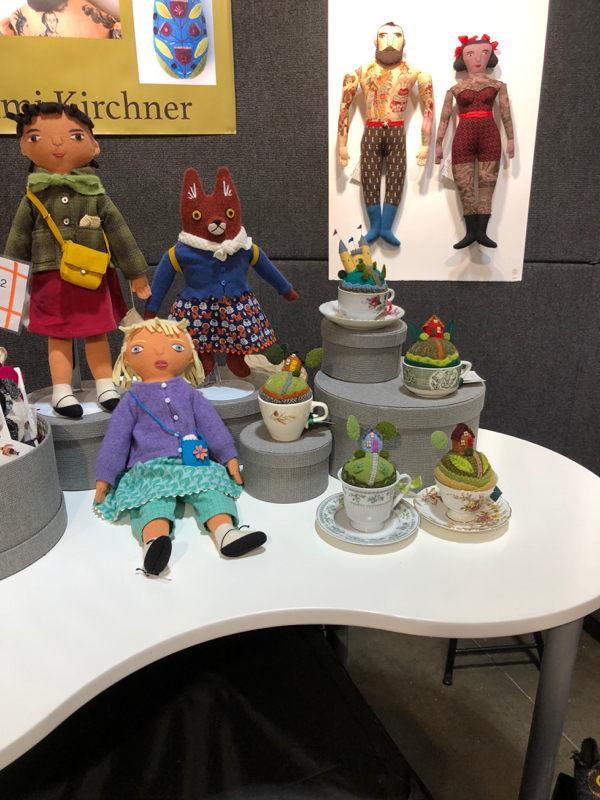
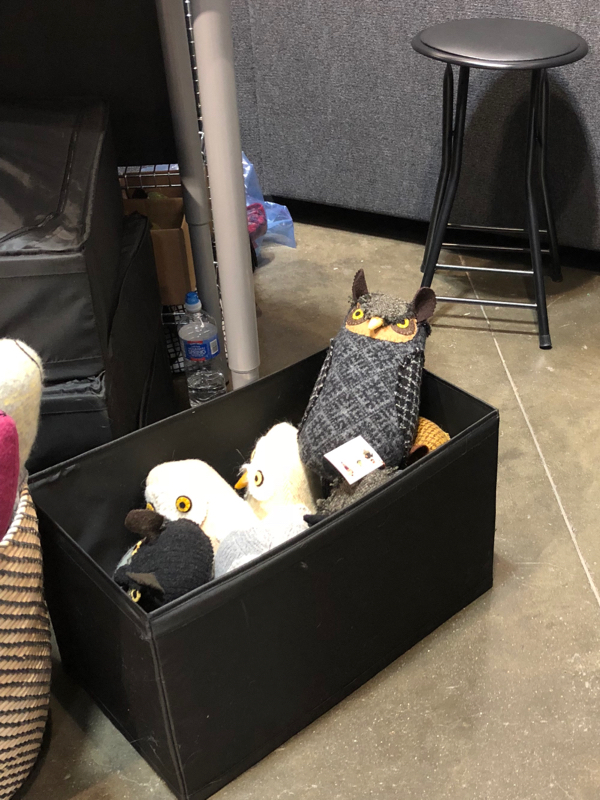
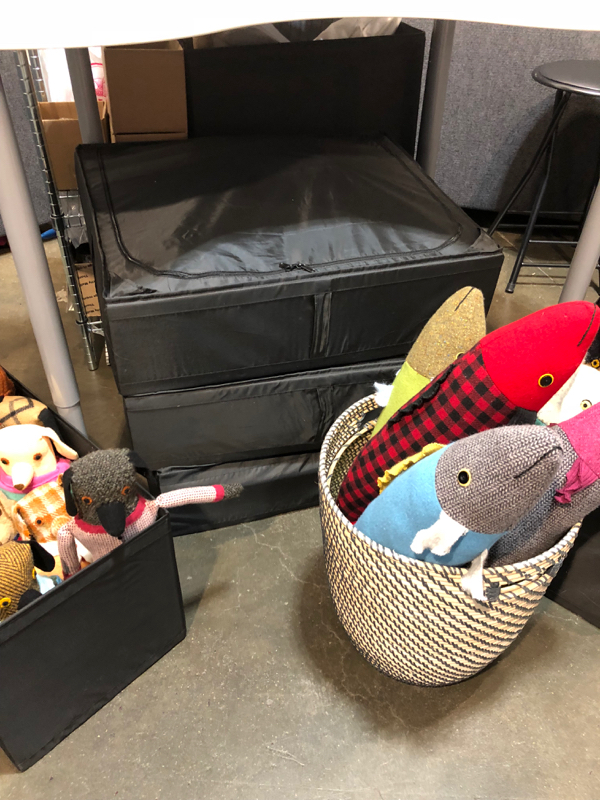
My extra inventory is kept in 2 open fabric bins-
And 3 zip-closed bins that store under the table. They are easy to pull out if a customer wants to see what else is available. The fish are in an Ikea basket.
By the last day, the zip-bags were mostly empty and I was rearranging the open storage- mixing things up a bit.
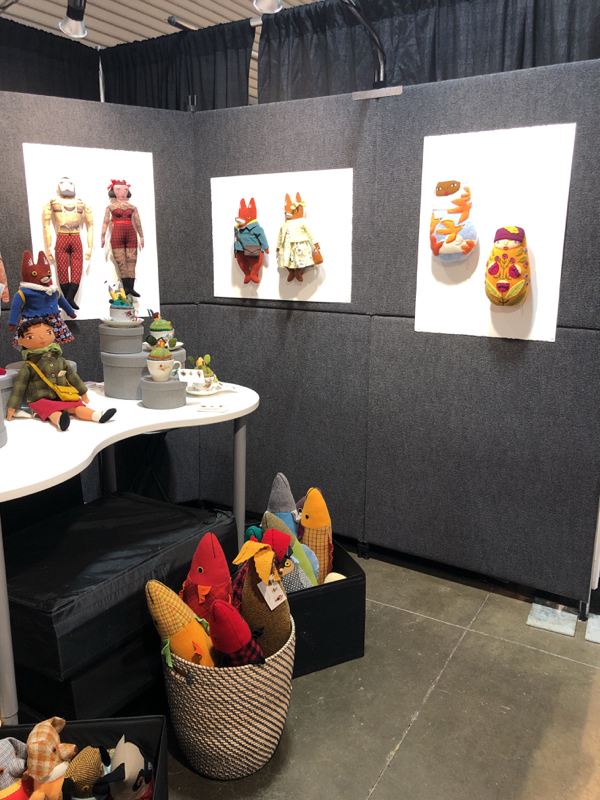
The dolls that are hanging on the panels are displayed on pieces of white art paper, pinned to the panels. If you have any questions, ask! I got a lot of help from friends to design this so I feel like I can pass the help along.
As an aside, I will be raising the prices of all my work as I list new pieces into my shop. Added expenses and increased demand are making that necessary. Tomorrow I start posting new dolls for 2018!
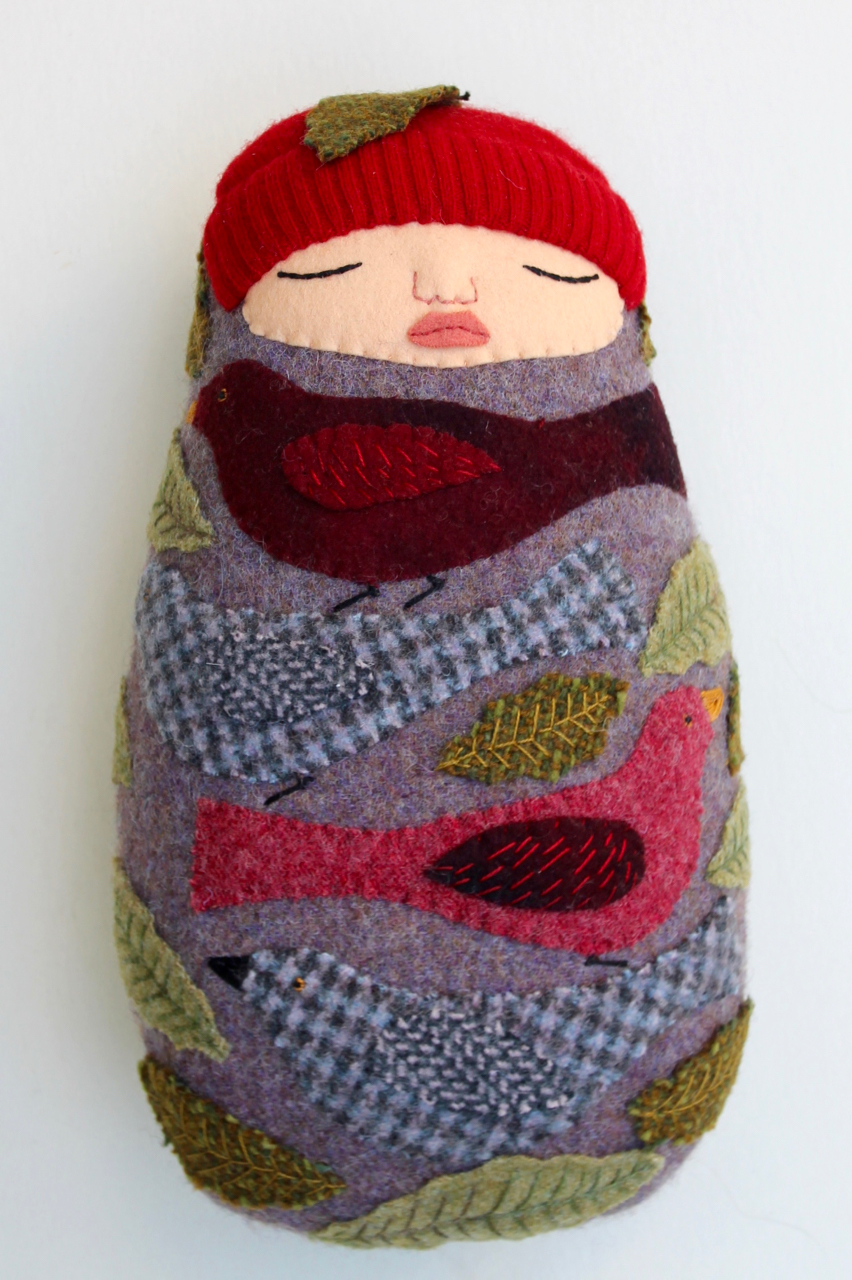
I love this dusty purple color- it always makes me think of an early morning mist.
Well, what can I say about the Nashville show. It was not my best show ever. As a result, I have LOTS of great work in my Etsy shop! So, good news, bad news ;) Also, I brought 2 of these babies to work on/demonstrate and I got them both almost finished. Hurray for that!


After I got back last week, there’s the giant pile of catching up. The regular life ones- laundry, groceries, sleeping, and then the biz ones- putting the show stuff away for now, shipping, emails, listing all those things onto etsy! Then another day trip away for a memorial service. But now I am ready to get back to work.
I feel like this is a year for me to try new things (example- different shows) and I now have pieces in 2 galleries- The Society of Arts and Crafts in Boston and also True Lily, a shop that my doll-making friend, Nancy Wiley, is opening in Canandaigua, New York. Of course, the thing is, it is always the year to try new things. You never get it all figured out, right?!
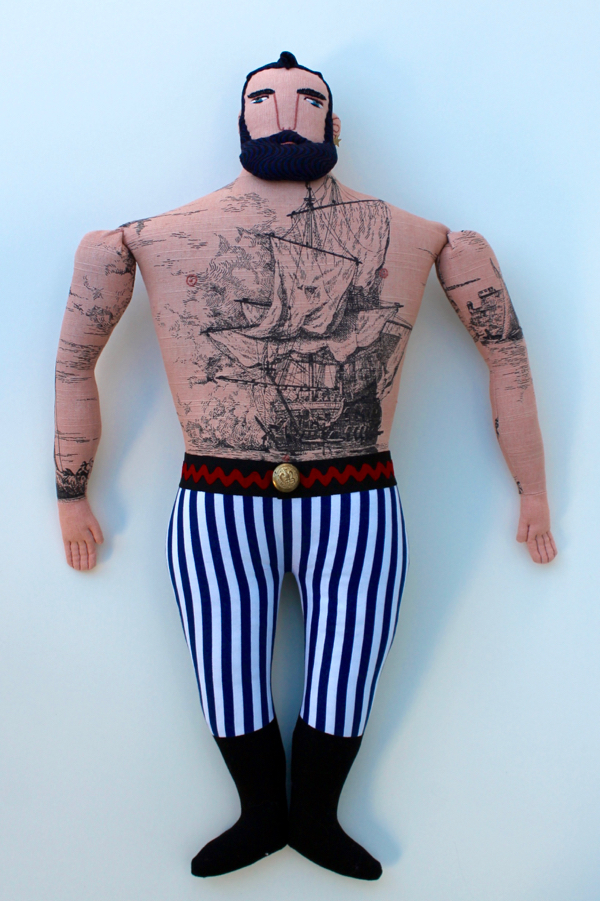
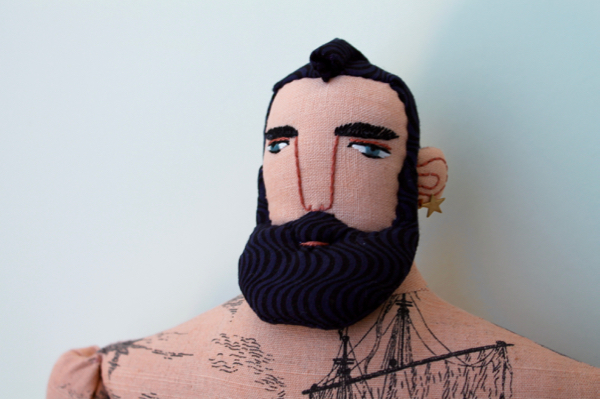
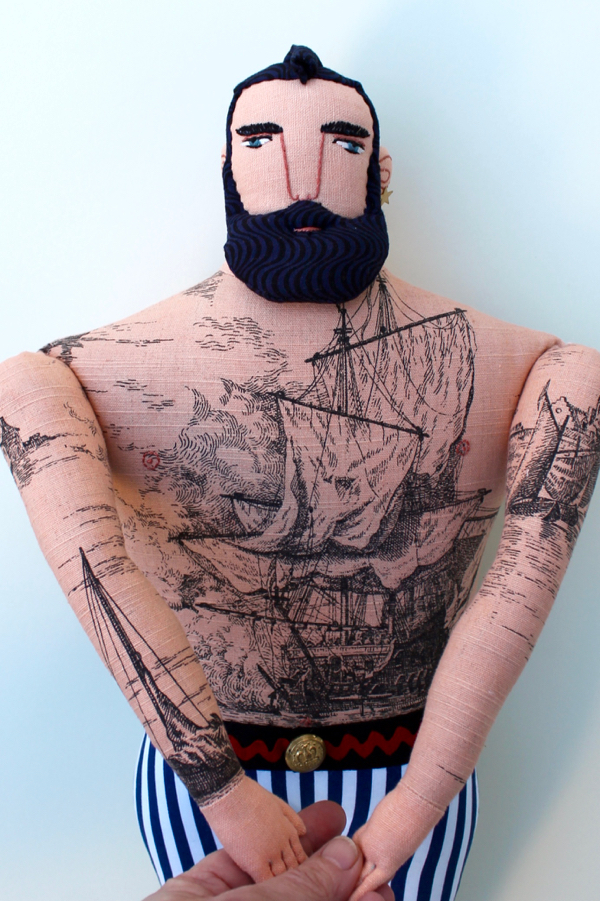
I finished him yesterday. I put him up on my desk just to look at him for a bit. Today I added an earring because he needed it, don’t you think?
I played with some new-to-me supplies/tools when I was working on the patterns. I didn’t write them into the pattern directions because they aren’t necessary, maybe just interesting.
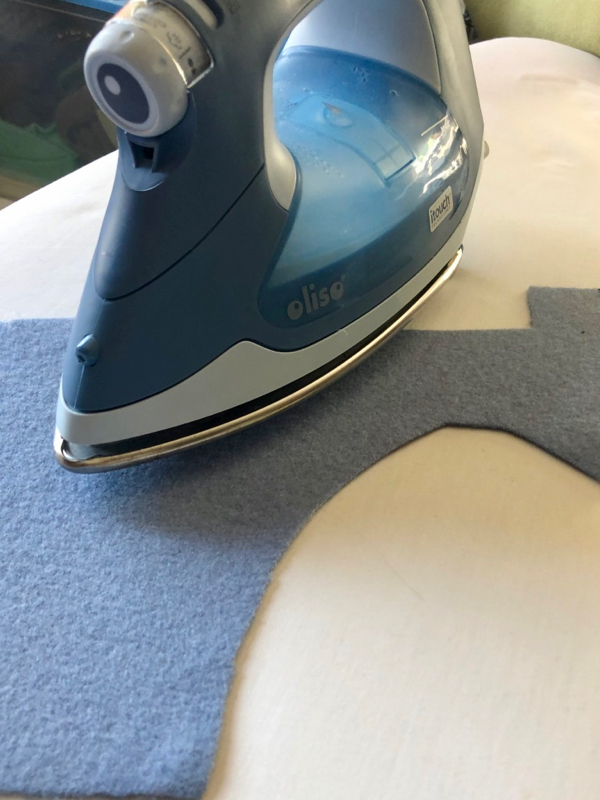
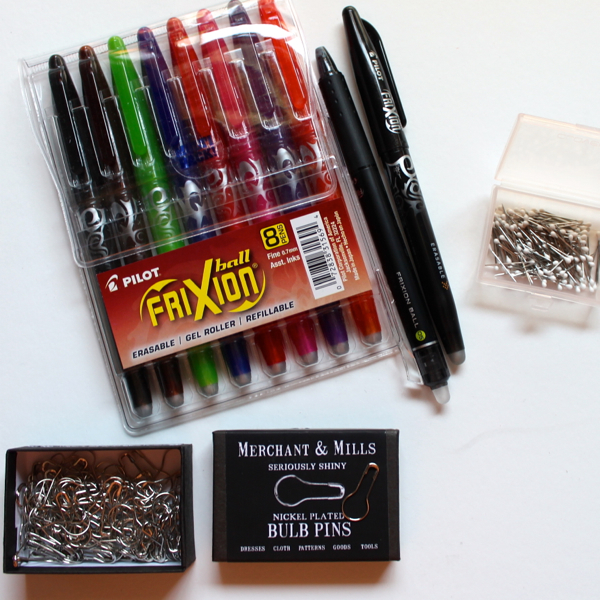
Have you heard of Frixion pens? They are erasable gel pens. There is an eraser at the end of the pen, but much more useful for me, the marks are erasable by ironing. That sounds like magic, doesn’t it! Well, there is a problem. Yes, the marks disappear with heat but they will reappear with cold. I would never use them on my dolls, but an ornament? I don’t think it is that big a deal if the marks came back a bit. The marks are either cutting lines or will be covered with embroidery. And, you could always iron them again. The thing is, these pens work great on the felt- so much better than the water-erasable fabric pens! I got mine on Amazon but I think they are available at lots of places. (btw- that link goes to amazon and if you buy the pens, I get a teeny tiny kickback!)
Next, Clover Applique pins. Short pins that work really well for pinning all those tiny felt pieces. You don’t end up trying to sew the equivalent of a porcupine.
And lastly, Merchant and Mills Bulb pins. I have been wanting to play with these funny safety pins. I discovered that I could pin them onto an ornament to hang it, instead of a string. And, I just wanted them.
I am over on Sew Mama Sew today. There is a profile and also a post about some of the things in my studio that I use everyday that you might not think would be useful for art or doll making.
They are have an event called 6 Weeks of Softies that includes a contest with all kinds of amazing prizes! All the info is here, if you want to learn more.

