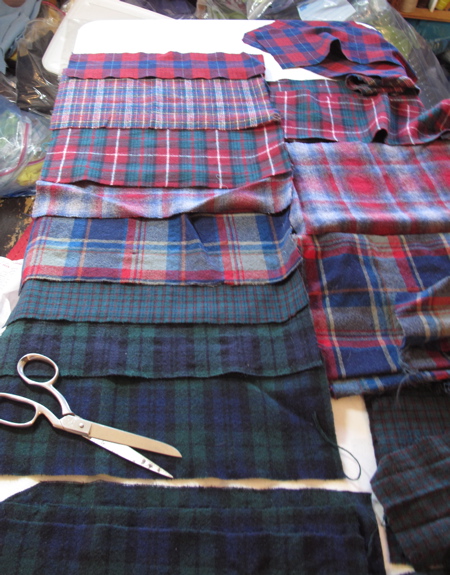
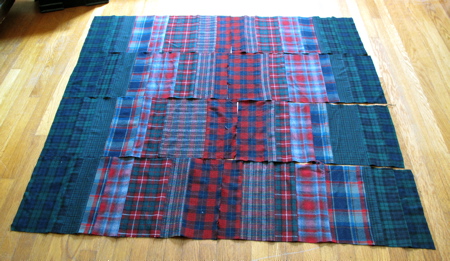
This quilt is made out of old wool shirts. I had 8 plaids in different color schemes. Red and green predominated. I love color and when I am doing non-figurative art, I tend to do color studies. The idea here is green to red to green again. I first used this way of designing a quilt 30 years ago when I made this one. (blues, dark to light and back again) When I posted about it last year, I couldn’t remember how I did it, but somehow it all trickled back since then.
I am not an expert quilter. I have never progressed beyond squares or rectangles. This is a very easy and, I think, non-scary way to approach patchwork. Careful measuring, cutting and/or piecing is not required. This is one of those “wing it” projects.
The photos are mostly underexposed so you can see the different fabrics, even though they are dark.
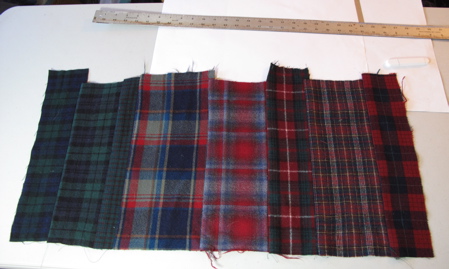
1. Make a template. Mine is 12 inches by 24 inches and made by taping 2 pieces of 12 x 18 inches of paper together. It can be any size but take into consideration what size fabric scraps you have and what size quilt you want to make.
2. I cut up my shirts, trying to get any piece of undamaged fabric that was at least 13 inches in one direction.
3. I piled them up by plaid and arranged them in order from most red to most green.
4. Then I laid them out in order on my template,
5. sewed them together, and
6. ironed them flat.
7. I trimmed each block so the sides were straight across
and 8. when eight were done, laid them out on the floor and played with the arrangement.
9. I sewed the blocks together- first matching the red centers and then sewed the four strips together lengthwise. Iron everything.
Now your top is done! Here is the rest of what I did to finish it-
10. Here is the top laid out on an old blanket that I used instead of batting.
11. Here is the back- I used the biggest pieces that I had and put them together with the least amount of sewing and thinking that I could manage.
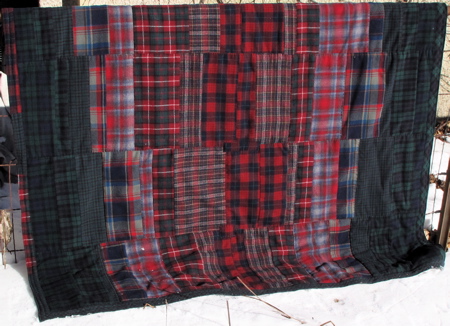
12. And now, here are the three layers quilted together and ready for a binding. I hand-quilted the layers together because I never could have managed it on my sewing machine. The edge is basted together at this point.
13. I folded over that part over on the right side of the above photo to make the binding on one side… since it was so conveniently just the right size!
14. I cut bias strips from the last of the shirt backs that I had and used them to bind up the 3 other sides. And here is another photo of it finished!
Let me know if I left out any important information or steps and I will edit this tutorial.


