I pieced the top in January. Fast forward to April, when I pieced a back and basted it together with the batting. Now it is September!
I have quilted it. Yes- I was very nervous. I did not want to do that thread knot quilting method- (whatever the real name is, I don’t know) like I did on this one. I knew I did not want to hand-quilt another full size quilt. I wanted to finish this before another 20 years had elapsed. And yes, I could have sent it out, but really, I am too cheap. And, I wondered if I would be able to let it go enough to accept what someone else did with the quilting. So what method did I use? I cut it into pieces that I could manage with my sewing machine, quilted them, and have sewn it back together. That took a lot of nerve and I’ve been talking myself into it for the past 5 months!
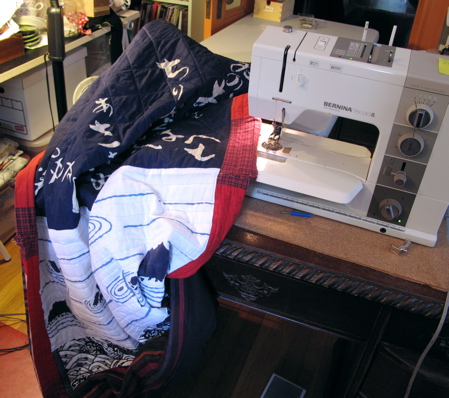
Here it is, in 4 pieces. Two pieces that are the middle section and two pieces that are the sides.
I slit the seams on the front, but had to cut through the fabric on the back. And, I pretty much had to rearrange my whole studio. That wasn’t a bad thing though- one of my post-Renegade Market resolutions was that I needed to do a major clean in there. In the above photo, all the pieces are already quilted and I am ready to start the sew them back together process.
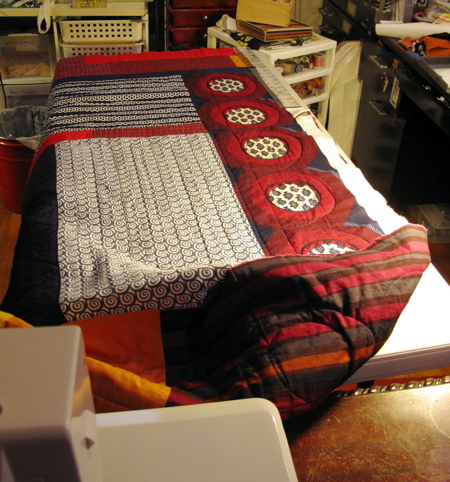
Here, I am sewing the 2 middle pieces together. My plastic folding table (behind my machine in this pic) proved to be very useful. I move it to wherever I need some quilt weight-bearing.
Now the table is on the other side of the machine. I am getting ready to sew the backing together along the cut line. Yes, I lost about 1 inch in total quilt size for each of the cuts.
Here is stitching the backing together. I have pinned back the batting and the top fabric.
I did the top finishing seam by overlapping the pieces and carefully sewing down, as close to the edge as possible. My walking foot was invaluable. I could never have done this project without it. I know this because I started without it- since I don’t do much quilting, I don’t even think about it. So, I started and was unhappy and frustrated with the results I was getting- within about 3 minutes. Queue lightbulb over my head!
Here we are, all sewed back together and ready to trim off the excess batting and even out the edges.
Now, on to the finish. And here I want to mention the power of stopping a project when you are tired. Last night I got the quilt trimmed, pulled out my bins of fabric with something in mind for the edging. I found it, cut out 30 feet of bias strips, sewed them together and ironed them. Then I went to bed. At some point in the early morning I got the message (weird, huh?) that I had made a very off choice. All wrong. This morning, back to the bins with a clearer vision. I am back on track and have spent the morning moving forward. Hurray!


Hurray! Great job, Mimi!
problem solved…yippee!
it looks really great.
congrats!
What innovative ideas for finishing this quilt, and it looks wonderful! I think you were very brave to cut it apart. I don’t know if I could have done that. The thread-knot method you mentioned is called “tying”, and it’s one of the most traditional methods of securing the layers of a quilt. The ties don’t need to be placed as close as yours (only every 4-6 inches apart) in case you want to tie one again someday. That would make it less daunting a task. However, I love the look of your ties closer together. It’s a very personal choice. I have aging hands that don’t like hand-quilting anymore, so I’ve started to tie all my quilts. Sitting at my machine with them presents other problems, as you discovered and found a way to solve, but I don’t know if I’d be brave enough to cut mine. Back to this quilt — it’s very striking with vivid bold colors, I love it!
Fab! And will end up fab. I’m with you about stopping and not obsessively overworking. Not good for body and mind and the piece.
Yours for piecing!
Wow! This is great. Seriously makes me want to try my own hand at this — thank you for sharing, Mimi.
Peter is going to LOVE this quilt! Very manly :D