atc, wip and some Chicago notes

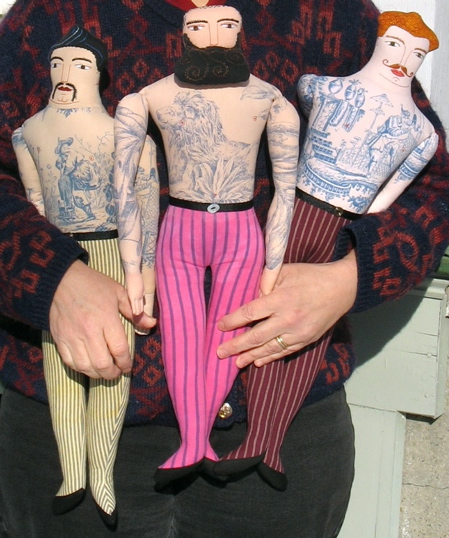
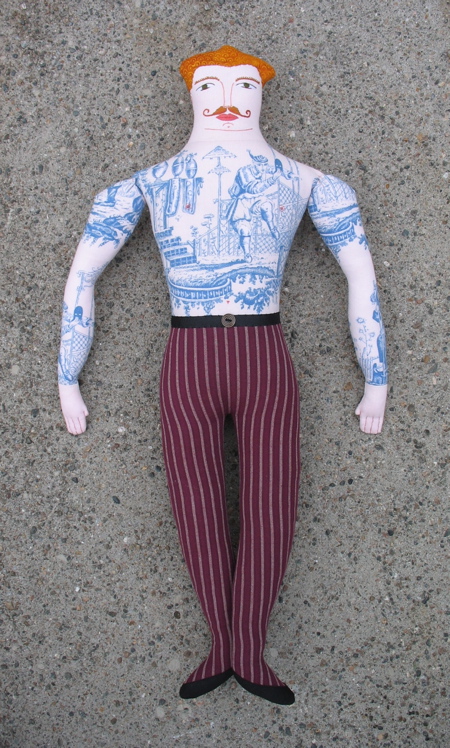
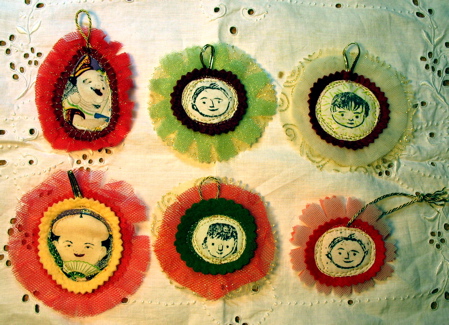
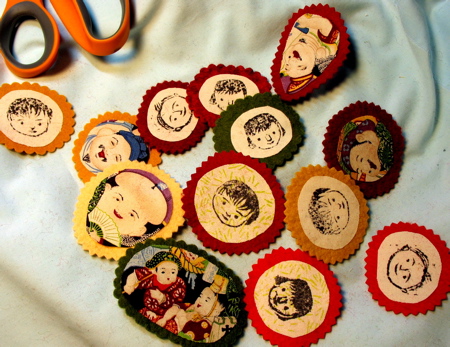
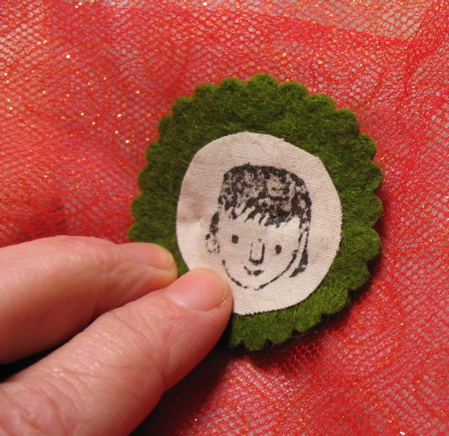
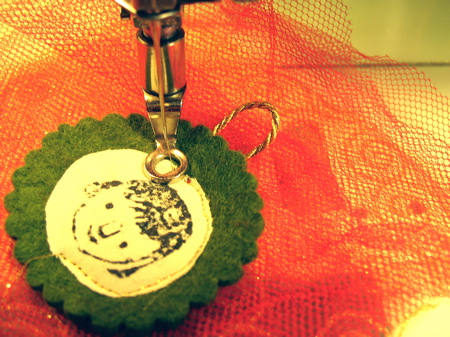
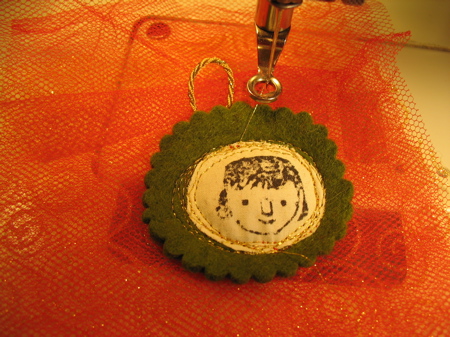
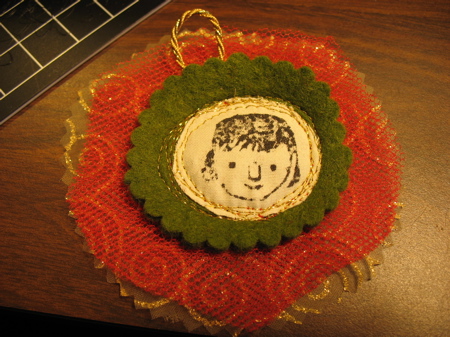
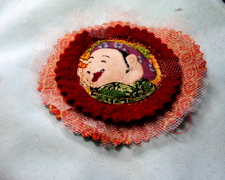
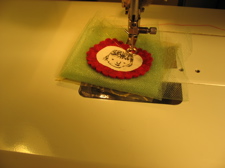
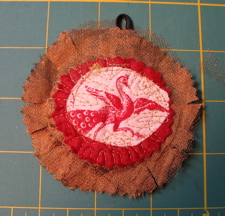
I needed to make some more of these school picture atc’s. I’ve been thinking about boys, which I pretty much left out of the last batch, and glasses.
1211atc.jpg

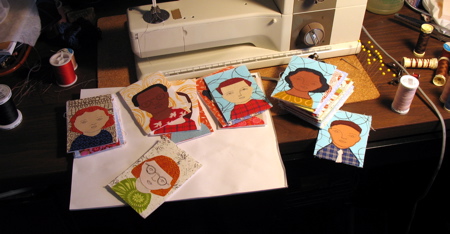
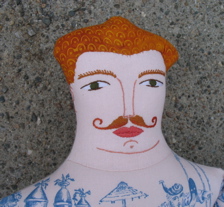
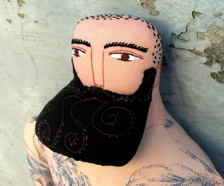
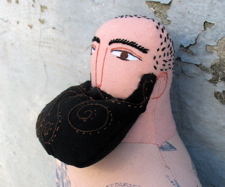
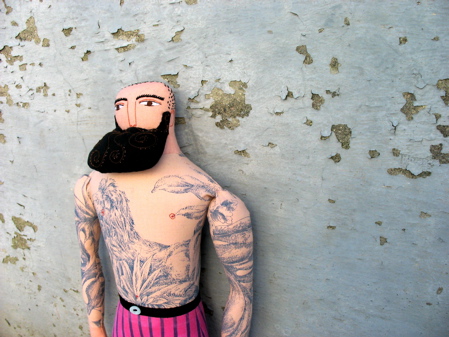
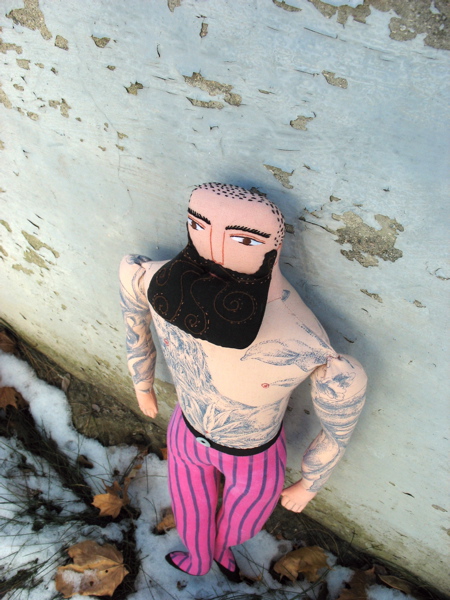
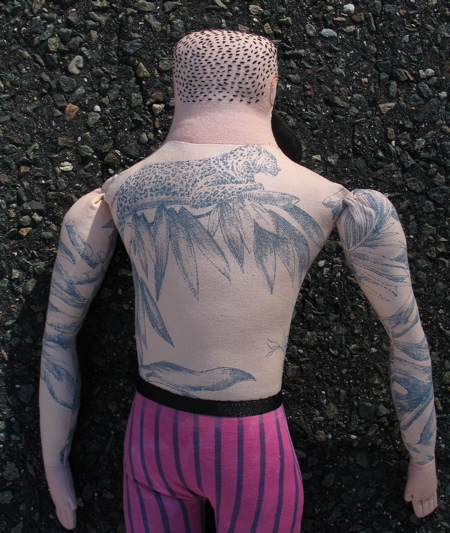
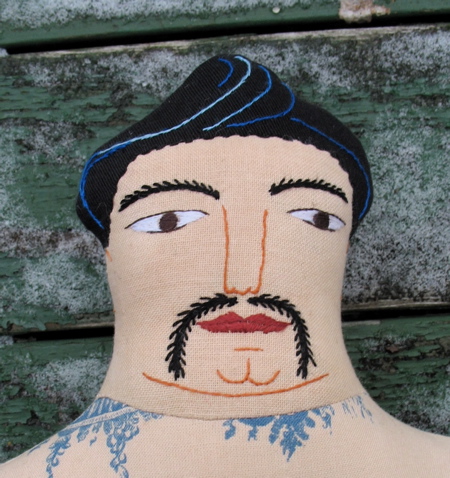
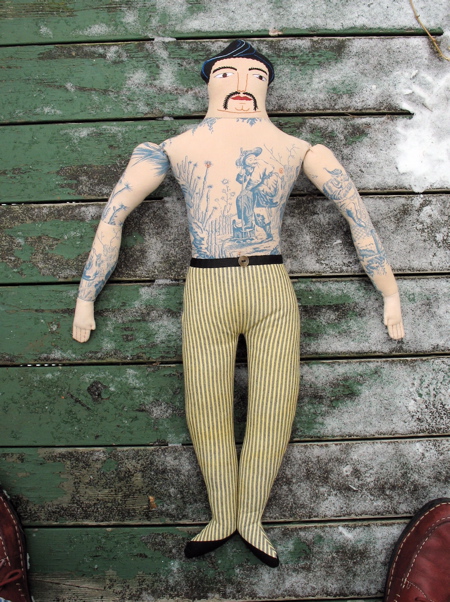
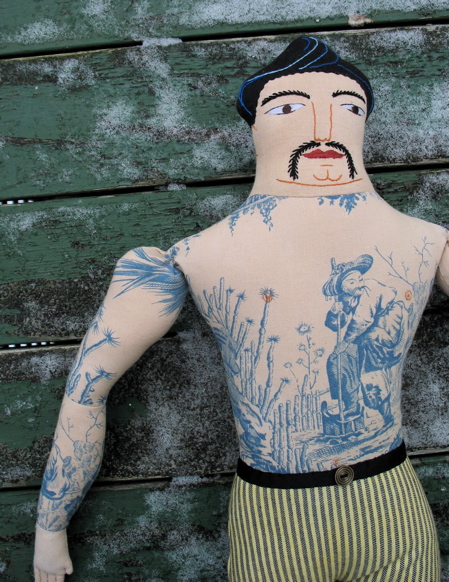
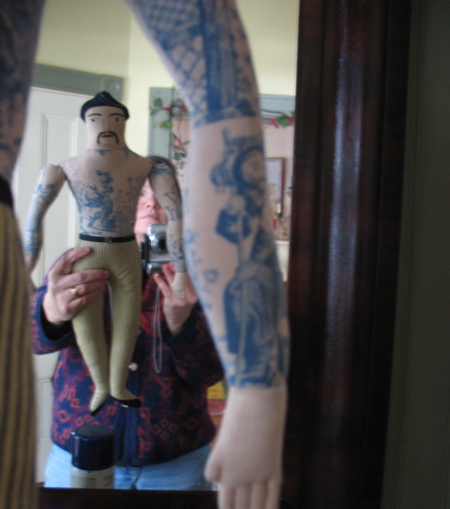
They should be done by tomorrow. I hope to post them and also the 2 moustached tattooed guys to Etsy tomorrow.

A story from when I was in Chicago for Thanksgiving- I was walking around in the neighborhood where my daughter lives. Down a side street, I saw an awning that said Toy Gallery. I got SO excited- a Gallery! for Toys! I rushed over to get a better look. It was a sex toy store… I still cannot believe how disappointed I was! I think in the nanosecond between seeing the sign and figuring out what the place actually was selling, I had developed a whole fantasy of what would be there- my fantasy best ever art gallery. Oh well… it amuses me every time I think about my reaction.

I had the pleasure of visiting Danny Mansmiths studio while I was there. I didn’t take any photos because he is always posting great pics of his studio at his flickrstream. I kept him away from his sewing machine for an hour or so- it was so much fun to see everything close-up and get to see the textures and layers of the fabric and the sewing. And gab.

I also connected with Brandy for a second… she was participating in a craft fair on the day we flew in. I really wanted to meet her so I went over. But, of course, meeting someone when they are at their booth at a craft fair isn’t exactly ideal conditions for craft/blog/get-to-know-someone-better talk. It is great for getting to see a bunch of someone’s artwork though, so that was wonderful!

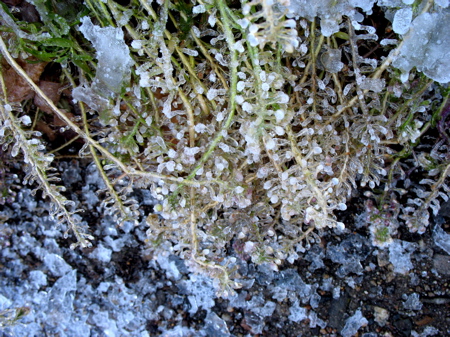
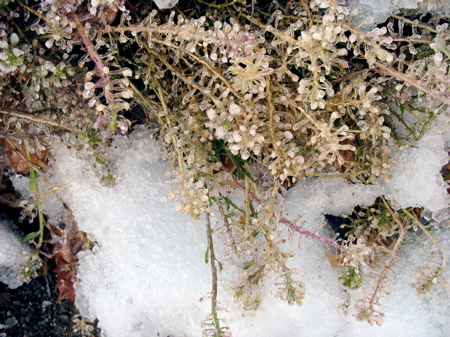
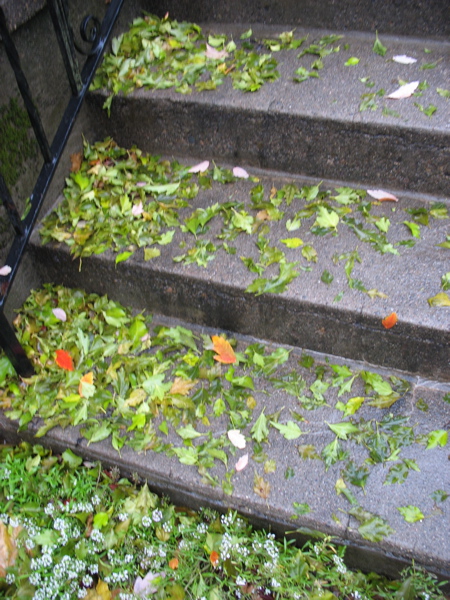
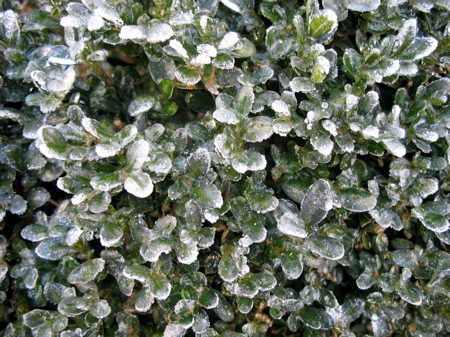
We have had unusually wintery weather since Thanksgiving.  Right now everything is coated with a glaze of ice.

the boxwood-

1211icyboxwood.jpg

and alyssum-

1211icyalyssum1.jpg

1211icyallysum2.jpg

And the last- for now

This is the last of the tattoo guys for now. I’ve been thinking about the use of the word ginger, for red hair. I hear it in my head from the audio books I listen to- think Marian Keyes. It is not just the word but the Irish accent of the reader… Anyway, that’s what was echoing in my mind while working on this one-
127gingertattoo.jpg

127gingertattooback.jpg

127gingertattooface.jpg127gingertattoobackhead.jpg

Here is a photo of the face embroidery in progress-
127wipface.jpg

beard 2, striped pants 5

One more after this.

Another bearded man.
126tattooman5.jpg

After I did the other bearded man, I started noticing when beards went by. I decided to try to make a pooffier one.
126beard1.jpg126beard2.jpg

I was having fun taking photos- well sort of… it was 19 degrees outside and my fingers were numb. But, I was enjoying the thought that I would never, ever, ask a real live person to stand and pose for me. Another wonderful thing about dolls!

126tattooman5torso.jpg

126tattooman5top.jpg

His back-

126tattooman5back.jpg

Yesterday was my first work day at Craftland.

126craftland.jpg

126craftland2.jpg

finishing things

I’ve had a lot of things “in progress” and now they are all getting finished up… It will seem like everything is happening all at once, but I’ve been working on these for several weeks now, dragged out by Thanksgiving break and all.

First, the green men pillows-

124greenmen.jpg

You saw that middle guy before. Here are the other 2-

124head2a.jpg124head2b.jpg

and

124head3a.jpg124head3b.jpg

They are approximately 18 inches tall. I stuffed 2 of these with the reclaimed wool stuffing. I will report on that in another post.

very easy ornament tutorial

I needed to make an ornament for a holiday swap. This was quick and easy and you could use the same basic idea to make tags, valentines, bookmarks… I don’t know- tons of other stuff!

121ornaments.jpg

Supplies needed-

-fabric with decorative image

-iron-on adhesive like Wonder-Under

-Felt- I used wool blend

-nylon net, tulle and/or any sheer or glittery fabric.
-I used gold thread, but you could use anything

-hanging cord or ribbon- 2 inches or more per ornament

1. Collect fabrics that have images you’d like to use- faces, birds, flowers, whatever. I used some commercially printed fabric with an asian design and also some of the fabric I made last summer with carved stamps. You could use commercially available rubber stamps to stamp fabric.

2. Iron iron-on adhesive onto to the back of your images.
121ornaments1.jpg

3. Trim your images to shape.

4. Iron onto felt.

121ornaments2.jpg

5. Cut out the felt, making a frame around the image. Use all those decorative scissors you own but never get around to using. I used pinking shears and scallop shears.

121ornaments3.jpg

6. Do a bunch!

121ornaments4.jpg

7.Fold up the net so that there are 6 – 8 layers of the net. Make a pile with your little image on top, the layers of net in the middle, and then some other decorative fabric on the bottom (optional). Pin everything together.
121ornaments5.jpg

7 continued- this photo shows the layers-

121ornaments6.jpg

8. Move your “sandwich” over to your sewing machine. (I sewed mine with free motion embroidery, but you could use zigzag, hand embroidery, or whatever else you are comfortable with.)

Fold your hanging cord/ribbon in half and place at the top of the ornament. Make sure you put it far enough down so that your stitches will catch it. Start sewing by going back and forth a few times over the hanger.

121ornaments7.jpg

… this photo does not show that though, because I forgot to put the hanger in EVERY TIME I made one!!! Mostly I remember to stick it in before it was too late, bit if you don’t, no problem. You can see that some of mine have a cord strung in the top of the ornament afterward. Easy!

9. Now sew around the edge of the image. Since I did mine with free motion embroidery, I went around the edge enough times so that the gold thread showed up and everything was well stitched down.

121ornaments8.jpg

10. Here is a view of the back- I used red thread in the bobbin-
121ornaments9.jpg

11. When you are finished with the stitching, clip the threads. Trim the net into a nice circle around the edge of your ornament. You can cut the net separately from the bottom fabric.

121ornaments10.jpg

12. If you want to be even fancier, you can cut the net in decorative ways-

-clip it all the way around for a fringe effect

-cut out wedges and it looks more like a star

Here are some more photos for information and inspiration-

121ornaments12.jpg121ornaments14.jpg
121ornaments11.jpg121ornaments13.jpg

I’d love any feedback on this. Are the written directions and the photos clear enough? Have I left anything out? I can never quite figure out the fine line between too little information and too much. Have fun!

fall photos

I was so pleased to receive this photo.  What a beautiful baby.  I love to think that a doll I made will be part of her life.
1130dollandbaby.jpg

Fall was late to arrive this year, but when the leaves finally started to change color, they were amazing.  I need to collect my photos here and I can remember, now that the trees are bare and the leaves are brown. Of course, we still need to rake them before the snow.

1130leaves1.jpg

1130color1.jpg

1130leaves2.jpg

1130leaves3.jpg

1130leaves4.jpg

1130leaves5.jpg

this was in Chicago- Eleanor’s feet-

1130leaves6.jpg

thrifting

This is how it works at my favorite thrift store.  The stuff is marked with colored labels.  Prices are as marked, on Monday and Tuesday.  On Wednesday, one color label is half price and one color is $1.  This week, for the first time, I decided to try to go over on Wednesday morning.  Woohoo.  I came home, feeling like Santa Claus, with 2 large full bags of wool goodies.  I spent $13.

3 jackets, 2 skirts, 2 coats-

1129woven.jpg

and 2 cashmere sweaters, 1 wool and angora, and 1  wool vest that someone in the house might actually wear.
1129sweaters.jpg

So, I come up to the door, dragging my booty and there is a package on the stoop.  Presents!  Kristen sent me this wonderful toile tablecloth which she thrifted!

1129toile.jpg

A great day for scoring materials!  I spent much of yesterday and this morning, cutting apart and washing all the woven wools.  I will do the knits another day.
Tomorrow night is the Craftland opening.  I’ll be there, for at least part of it.  I am looking forward to seeing the space all set up, the other work, and meet other artists.

craftland_banner.gif