traveling

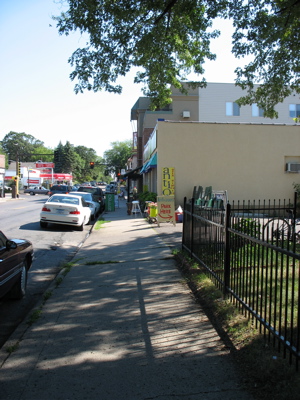
I’m out here in the Minneapolis regional area somewhere, at the NIADA conference, meeting new people, seeing amazing dolls, having a fantastic time. I got to town on Wednesday and met up with Kristen of Kleas on Thursday. I had connected with her online through an atc swap and some emails. When I told her I was going to be in Minneapolis, we planned a rendezvous. She showed me around to some fun neighborhoods of the area that I am sure I never would have found on my own. This is Hunt & Gather in Edina.

edina

I was so tired I was probably mostly incoherent, but Kristen wrote an incredibly nice post about our afternoon here, if you want to check it out. Meeting people through my blog has been a real treat for me- an unexpected benefit. Reading blogs becomes so much richer when I have a face to attach to a written voice.

sketchbook/mini-portfolio thing project

So I just did a group of postcards. I had fun drawing little doodles on fabric with Micron Markers. We had a family field trip over to Utrecht to buy art supplies for Peter’s summer classes. Surprise- look what I found! These fantastic markers were on sale, only .99 and in such beautiful colors- So much for Peter’s art supplies!

markers

Well, the new markers inspired this little project that I did today. I was thinking it would be fun to make myself a sketchbook with cloth pages instead of paper. Then, I could snip out little drawings when I wanted to do the applique collage postcards or atc’s. I made myself 2 piles of fabrics and put sheets of freezer paper between each layer of fabric. I machine sewed an edge and then sliced them into sketchbook sized pieces. I’ve ended up with a total of 5, so I am probably set for life.

pads

The fabric “sketchbooks” are way too floopy to use, so I decided they needed some kind of support structure. I made a little portfolio cover to put them in. Here are all the parts layed out. The colors in this photo are accurate- the next photos are sort of washed out. You can see the cardboard covers and spine on the right of the photo.

parts

Here is the front- it has a pocket for my pens and pencil-

front

and the back- it closes with a wrap around tie-

back

here are some pages. You can see the layers of freezer paper. This pad has lots of colors, the other side is mostly white. The 2 pads are held in place with bulldog clips.

pages

and I put a strip of fabric in the back so my little moleskin can have a place too.

flap

I did this using the same technique that I used on this project- wonder-under onto cardboard. I am still amazed.

postcards

I finished the postcards. They are all in the range of 4 inches by 6 inches.

postcard1

postcard 2

oops- this tree one doesn’t actually have that white thread mess on it…

postcard 3

I thought the doily could look like a wicker chair-

postcard 4

postcard 5

I really like how the tree came out on this house one- I’ll have to play with that imagery some more-

postcard 6

postcard 7

postcard 8

postcard 9

I will put these into my etsy shop when I get back from NIADA. I don’t want to worry about not mailing them when I’m away. They will be $20 each, in case you wanted to know…

Boston evening

We went into Boston last night for a concert at the Hatch Shell. Such a Boston thing. They were doing Mozart’s Requiem. It was great to hear it again, although I couldn’t quite enjoy it as much as the first time since my kid wasn’t up there on the stage!

concert

We walked over the Charles River at the Mass Ave. bridge to get back to our car. It was so beautiful at night.

river

news and questions

so busy but so little accomplished!

I went to see Abby last week, to deliver her share of our Super Fluff order- minimum order is 2 cases which is 2 boxes with 20 pounds of stuffing each- the 2 boxes together are about as big as a refrigerator! It is always great to see peoples work and be able to touch everything. No matter how good the photos are, it is not the same. And I was lucky enough to meet the 2 little nappers- what sweetie-pies!

On Saturday, I went to the Somerville Artbeat where I got to see Erica from mmm…coffee and I was actually bold enough to introduce myself. Her new felt creatures were wonderful. Some other craft bloggers were there including Sewing Stars but I didn’t talk to her. Magpie was right next door to them and was giving away fans. I snatched one up because I sure needed one- it was Very HOT!

Daughter Eleanor was doing her thing at the Gay Games Opening Ceremony. I was thrilled to see that Lisa of Bird in Hand had posted pics on Flickr. Later I’m going to see if I can find some more flickr photos of the opening ceremony.

Next week ( 7/26- 7/31) I am off to Minneapolis and the NIADA conference. After that, I am flying into Chicago for a few days. If anyone wants to try and meet-up or has any suggestions for great places not to miss, I’d love to get some input.

I am hoping to get some work done before I go off… we’ll see.

little red ridinghood

Little Red Ridinghood is done-

red ridinghood

her face-

face6

and body applique-

torso

When I was in New York a few weeks ago, I went to Purl Patchwork. While I was browsing around and drooling on the Liberty of London fabric, the sales person was talking to someone who must have been a beginning quilter. She was showing her how to cut curves and sew them together and then got onto applique. I was listening to it all- not much of a challenge since the store is tiny. She described an applique technique that I’d never heard of before- so obvious and yet brilliant! I don’t think the person she was talking to understood what she was trying to describe, but I got really excited! I just did a 2 minute Google search to see if I could find a good description, but could not so I’ll try to explain.

You have your chosen fabric and then something like a very light not iron-on interfacing for backing. I had some used dryer sheets and thats what I used- they worked perfectly. You put your fabric face down on the backing. You sew the outline of your shape. Clip the curves and trim the seam. Cut a slit in the backing. Turn the little shape right-side out. Now, all your edges are turned in for you- iron it flat. Sew the shape in place.

I knew I had to try it and I did on this doll- on her basket, arms and the lower edge of her hood. It works beautifully. Thanks, whoever it was at Purl Patchwork that day!

wip’s

working on-

it is clearly time to move on from the robots. I’ve lost all my enthusiasm for now. I have been working off and on with this one- maybe she’s finished, maybe not… I’m stepping back to look at her for a while.

fembot

Instead I’m going forward with little red ridinghood. I drew this in my sketchbook months ago, inspired by this diorama by Natascha.

wip

better pictures

the light is good today so I’ve taken lots of photos-

Kitties 4 and 5

I think of them as brother and sister instead of a couple.

2 kitties

They can sit with a little encouragement- I gave them a hip seam.

boy

boy face

his felt school/messenger bag. It can open up, but I haven’t put anything in it.

cat bag

I wish I had made the sweater just a little bit shorter- I don’t like how it goes over the tail.

back

And here is the sister cat-

girl

girl face

They are about 14 inches tall, made of mostly recycled and/or vintage materials (except her skirt fabric and his felt bag). The sweaters are made by recutting old sweaters. His is slightly felted so it was easy to cut and sew- no unraveling. Hers did not full at all when I washed it, so when I cut it, I had to be very careful. I bound the seams so it won’t fall apart. I always try to use the ribbing from the sweaters because I think it makes them look so much more authentic.

2 kitties

I finished these yesterday and want to post them even though it is so gloomy here today, I couldn’t get a decent picture- I’ll try again tomorrow-

These kitties are made of recycled sweaters, 4 altogether. A black angora blend (so soft), a white, a wool stripe, and a lacy wool blend. The girl kitty has some rickrack and lace that I bought out in Sturbridge on Monday.

2 kitties

wagging their tails…

tails