Hey, I won something!

211prize.jpg

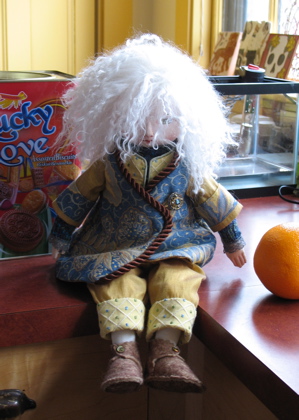
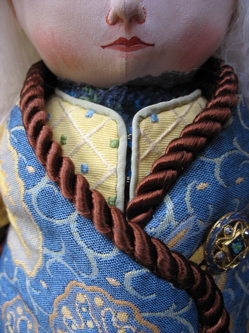
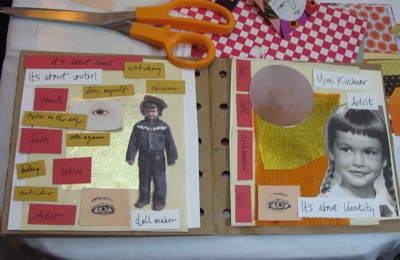
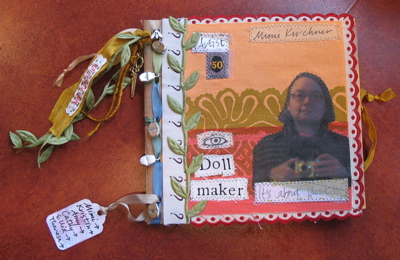
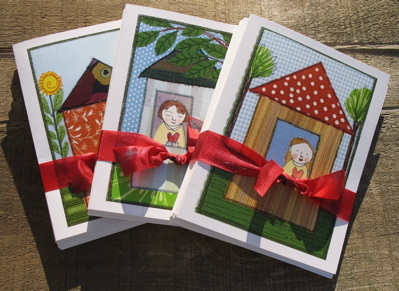
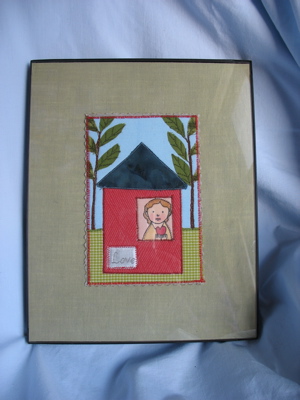
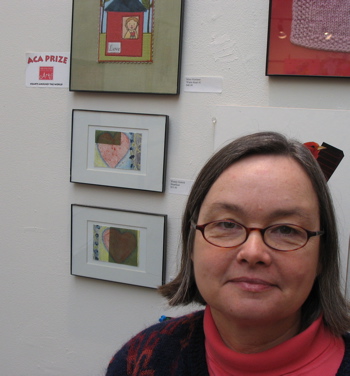
Look at that! I won a prize! My contribution was chosen for the ACA award which means that next winter, my art will be on the cover of the catalog- I got a call on Thursday to tell me that I’d won and it made my day, my week, maybe longer! There was an opening today where they made a presentation of prizes. They said very nice things about my piece and asked me if I had anything to say… which of course I didn’t- I froze- uhhhh.

And here are flowers that we were suppose to give to Eleanor. We were down in New York for Friday and Saturday.
211flowers.jpg

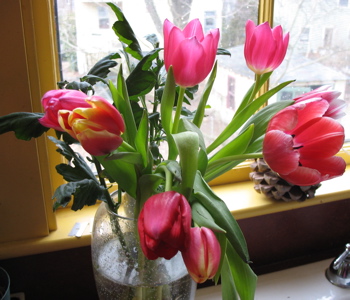
Eleanor directed a play at school and this was performance time. It was fantastic! Sorry about the flowers though…

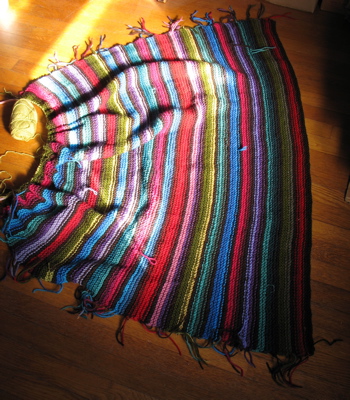
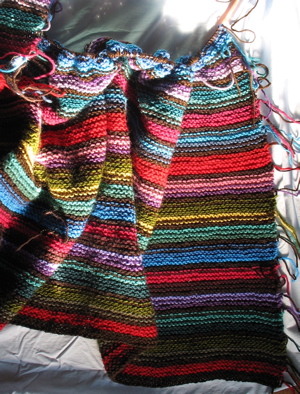
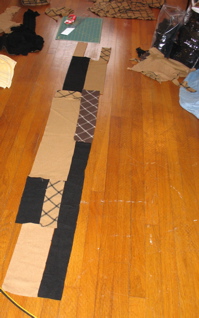
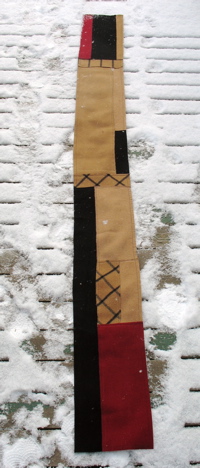
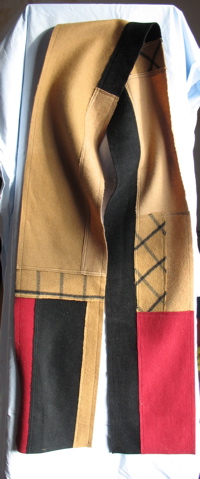
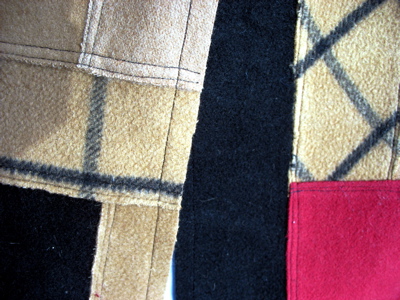
On another topic- I am so sick of my knitted blanket project. I am pushing to finish it because I have all these other things I want to work on but don’t want to start until it is done. One of those personal rules things.

Wednesday update

My postcard is up on the ArtStream shop now- check it out. There is loads of great artwork for under $100.

27blanket.jpg

Week 4- The blanket continues to grow. It is now 35 inches long and weighs 1 pound 2 oz. It seems much heavier as I’m knitting it. A big plus right now- it covers my lap and it’s been freezing around here!

I’ve been thinking about pears-

27pears.jpg

I’m not sure where this is going.

And, I’m working on a new design which involves…

27paper.jpg

messes. Scrap paper, scrap fabric, tape, glue, and a trash can.

This is what I’m working on. No, they aren’t aliens.
27babies.jpg

bag doll so far

25dolla.jpg

Here she is, sitting in the kitchen. She is not done yet. Her wig is not finished, just pinned on. I’m thinking about a hat. There were a few other things in the bag that I haven’t used. I’m still thinking about them. I don’t have to use them but it would be fun to use it all…

I really struggled to get the center opening of the vest and the cross-over of the coat to match up. I put lace around the collar but it doesn’t really show here.
25collar.jpg

the coat button- it was part of my bag.

25button.jpg

The vest and the lining of the coat-
25layervest.jpg

sleeves and lace at the wrist-

25sleeve.jpg

Here she is with my hand which may give you some scale. Also, little buttons on the sweater.

25dolllayers.jpg

One of the challenges was how to make the layers close, without having too much bulkiness in the center with buttons, snaps, overlaps, etc. I decided to butt the edges of the sweater and make loop buttonholes. Same with the vest, except I used hooks.

Here are the shoes-

25shoes.jpg

Since I’m not quite sure what else I want to do and I have another project pressing, I’ve started on something else… But really, I will try to finish this and not get completely distracted!

works in progress

I didn’t get much done on the blanket this week-131blanket.jpg

It is 29 inches long now. It is getting bulky to work on- warm, but hard to maneuver.

My doll is coming along, although she won’t be finished for doll club tomorrow. Here is where I was this morning-

131doll1.jpg

I wanted the sweater to be more form fitting. I ended up cutting it down the front and took some darts at the sides. No buttons yet- actually, I’m not sure about how I’m going to close the sweater.
131dollb.jpg

The coat is mostly done- no button yet. She’s got felt shoes- no buttons yet. I am trying out this hair- undyed cashmere goat.

I decided she needed another layer- vest in progress-

131vest.jpg

And here she is at the end of the day with her vest on. I’m thinking of going with tibetan lambswool hair- it fills more space and the frizzies have a lot of personality.

131dollc.jpg

Everything is pinned on- hair, sweater, vest, coat, shoes. Everything needs closures of some sort… well the hair will need glue. I’m still thinking about some lace too- I paint “dyed” some, but I’m not satisfied with the color yet. And I’ve run out of time for today.

my other paper bag project

I am doing another paper bag themed project- this one with my doll club. The idea for this one was that each person who wanted to participate would put a selection of materials into an opaque paper bag- a fat quarter, trims, buttons, whatever. Then, all the closed bags were shuffled up and redistributed. The idea was to get people inspired and excited about something new. Not that I need inspiration… I’ve got a huge long line of ideas I haven’t gotten to yet, but I wanted to participate anyway. I am finally getting to work on it (doll club is Thursday and I’ve had the bag since November!). I am using this project as a way of dressing some of my poor naked dolls- see New Years resolutions.

This is what I got in my bag- oops, I photographed the wrong side of the large floral fabric. There is also a beautiful button that somehow got misplaced before I started taking pictures.

130fabrics.jpg

Here you can see the doll I’m using- I took off her hair- it really gets in the way while I’m working. I’ll glue it on at the end.

1301.jpg

and that is the right side of the fabric- it is beautiful. I was very lucky with my bag- thanks Jenifer!

130doll2.jpg

and one more photo- I’ve got the pants mostly done. You can see the dotty waistband in the 2nd photo. The sweater and socks was what the doll was wearing before I started. I’ll have to decide about those. I have one sleeve on- very fancy, 2 fabrics because … I didn’t have enough fabric to make the sleeves so I improvised. I’ve got the lining chosen (the hard part), cut and sewed. Now I need to go put in the other sleeve and put the lining in. The girl probably won’t be finished by Thursday, but she will be a lot closer to being finished. Yeah!

And, thank you, thank you to everyone who has bought my cards! All the orders have been mailed so you should be getting them soon!

velcro

I found this yesterday, on the bottom of the little drawer where I store my snaps- I have no idea where it came from.  Not my Mom’s or MIL’s handwriting.  It made me laugh-

130note.jpg

It says- “to sew on to material to stick it together like snaps”

here  is what was inside when I unfolded it-

130velcro.jpg

Paperbag Swag

I am doing a round robin project with 5 other blogger/artists. Theresa organized it. We have a flickr group and there is a description of the project there.

I started out thinking paper collage would be fun to try. This whole thing seemed very new to me- pushing me out of what I usually do. Not a bad thing. This is how I started-

126starta.jpg

I worked and pushed and tried all sorts of stuff. This picture is midway through my process. The left side ended up as the insert-

126inserta.jpg

The right side collage ended up in the trash. I worked and worked on it. I thought it was finished enough that I even glued it onto the cover. I just wasn’t happy with it though. I kept trying to add more to make it better. Finally I decided I wasn’t willing to send out something I was so dissatisfied with- it would be embarrassing! I had to remind myself- Don’t be afraid to throw something away and start over! I scraped it off and did this instead-

126cover.jpg

Much better! It’s funny how smoothly things can progress once you are moving in the right direction. Sewing and fabric was much more comfortable for me- even when combined with paper and collage. Here is the rest of it-

back cover-

126backcover.jpg

other side of the insert-

126inserb.jpg

the edge-

126edge.jpg

126mimi.jpg

126tag.jpg

My theme was me- a self portrait. I think because that’s what I wanted to try once I got into the collage thing. I will be posting about this project every so often in the next 6 months. I’ll be mailing it off to Kirsten tomorrow.

Yippee! They’re here!

125cards.jpg

They were finished a day early! I have listed them in my Etsy Shop. They are large note cards- 6 1/4 x 4 5/8, blank on the inside. They are printed on a linen texture paper. $12 for 6.
125table.jpg

They come from the printer scored, but not folded. I’m going to be busy. I’ve set myself up on the dining room table- sorry family…
125cardsb.jpg

I’m putting them together in packs of 6- one card of each image and tying them up with a ribbon- thanks for the great suggestion, Abby! And all your encouragement.
125cardsa.jpg

here is a close-up where hopefully you can see the texture on the paper-

125close-up.jpg

I’m really pleased with how they look, although this project was very stressful for me- so many decisions… size, paper types, borders, etc. I am sure it will be a LOT easier next time- it is that first step that’s so hard. I have to admit, I love having them to touch and look at. I’m glad I ended up having them printed locally. So now, go and order some some you can send them out to all your valentines!

some things get done

Here is the weekly progress report on my blanket-

124blanket.jpg

let’s see, I started it on 1/9 and now it is 24 inches long. That might be half way. It is very drapey and warm to work on.

Well, I got a piece into the show after all! It turns out they are being very relaxed about accepting work so I brought over my piece today.

124warmheart1.jpg

First though, I framed it up. I was lucky that the postcard fit perfectly into an 8 x 10 standard frame. I backed the postcard with linen. As I was pulling out various lengths and scraps of possibilities, I came across a reminder of why I like working with my Mom’s fabric-

124tag.jpg

It all feels like so much family history.

I also framed up this one-

postcard.jpg

and it will be going up to New Hampshire for the Lovely Hearts Show at Artstream.

Update on the cards- I have the original postcards back from the printers and that why I could submit them to the shows. The notecards are suppose to be ready for me on Friday… they had to order the paper and various other delays. I am keeping my fingers crossed. I will put them into my etsy shop then. Does anyone have a great source of the clear sleeves for packaging them? I am a real beginner at this end of things!

scarf for Julian

The night before leaving for Minnesota, it became clear that he didn’t have a scarf. I made him a scrappy one out of woven cashmere from my mom’s scraps.

Here, I am playing around on the floor with design and color possibilities-

123patches.jpg

I nixed that brown check and added red.

Here it is, laid out on the front porch, finished (yes, we had a little snow last night)-

123scarf1.jpg 123scarf2.jpg

a close-up of construction-

123scarf3.jpg

It is 7 3/4 inches wide and 6 feet 8 inches long.

I’d like to make a blanket like this some day- wouldn’t that be fantastic, a cashmere blanket?!