more tiny world pincushions

I got a few done for the market. And more not quite done- housing futures…

A snowy hilltop.

That tiny snowman was fun to make. And here is the back-

I call this one Big Flowers- inspired by my amazing sunflower crop this year.

and the back-

This one, with a white house, sold.

I will be doing an Etsy update tomorrow (Tuesday 9/23) around 3 EST. I will list the 2 pincushions and 2 girl dolls. Also, some more magnet sets. Sorry, no tattoo men right now.

banner

this is a side project I’ve been working on-

It is a banner for shows. To avoid the embarassment of realizing, halfway through the day, that I haven’t got my name anywhere in my show booth… yes, it has happened. Several times.

detail-

This is a carry-around project, a watch a dvd project, a project to do when other projects aren’t going right. I actually have a doll finished. I will probably post her tomorrow. I am still thinking about whether she is done.

finished bags and comment thoughts

I’ve been mulling over some blog/craft related issues. The thoughts are not chosing to leave on their own, so I will put them here. And so as not to bore anybody, first some photos.

I finished the 3 bags- gifts for various young women in my life.

I made patches from the fabric I printed for a swap last summer- almost exactly a year ago now.

So now for some blog thoughts. I was at a party a month or so ago. I was sitting with a small group of people, all of us involved in the on-line world in various ways. Two of the people at the table, one a man and one a woman, started making fun of the type of comments that people make on food blogs (and also craft blogs by association, although I’m pretty sure they have never spent any time in the online crafty world). I was hearing that the comments were somehow not legitimate (?) or stupid because no one is giving criticism. Too much nice. All very kindergarten. No real issues are discussed. hmm… I don’t know…  I’ve been turning this over in my mind ever since.

We, in crafty blog community, are in a unique corner of the internet universe. To prove this point, this sequence actually happened to me recently.

A man commented on one of my Flickr photos. This flashed through my brain- OMG, a MAN on the internet!

Does that say something about the corner that we inhabit? I don’t think many of the art/craft blogs I look at are putting their work out into the world seeking constructive criticism. Who asks for that from strangers? If I want a critique of my work, I ask someone I know well, whose view point I respect, who I believe has some understanding of where I am coming from and who I can watch as they interact with my work. So why do I put my work out there? To connect with other people who are interested in what I’m interested in. Imagine- look! look! embroidery! wool! cool!…. I can assure anyone who questions this- it is not so easy to find people who get excited about this stuff. So, of course all the comments are nice and oh so gushy- we are thrilled to find someone else who gets what we are into!

Okay, that’s the first rant off my chest. I’ll leave more for another day.

happiness is starting new projects

?  That has got to be the reason for what has been going on in my studio this past week!

I am having a little problem with my focus. I started by cutting out three grandmas- a doll that has been waiting in line to be made for a long time-

but I needed to cut out some babies too, because I had *an idea*. (six babies) Actually, several design images floating around in my brain that really need to land on something soon-

So, I’m going along, working on the grandmas, and I get frustrated with the face (that is why it is not showing in the picture). Instead of moving over to the projects that I have already cut out, I start thinking about some gifts on my list. So, I cut out three tote bags-

hmmm. Now they are partially done too. Oh well, sooner or later I will have a finished project to show you- because I’ve got 12 of them going here!

tiny worlds

well, I have been getting some things done… small projects that are taking much longer then they should because of all that other stuff. I am trying to make some smaller things to fill out my booth at the Marketplace.

Pin cushion worlds! This is the first time I’ve made any with the idea of selling them. Here are the first ones-

house 1-

house 2-

and Rapunzel’s tower-

Here is the back view- since that is what I always want to see-

I wanted to use the extremely flowery decoration on these tea cups as inspiration. I thought about houses with gardens. There are more in the works.

tomato tutorial- making containers

I want to grow tomatoes this year. I want to have a LOT of tomatoes instead of a few very precious and expensive ones from the farmers market. Unfortunately I live in an old house with toxic soil around it- not unusual in New England urban and suburban areas. The soil has years of lead paint scrapings, car fumes (more lead) and who knows what. It is not soil anyone would want to grow edibles in. The solution is raised beds or containers. I am going to try to write a tutorial about how I planted my tomatoes based on the excellent suggestions of Bella Dia.

I think I’ve mentioned before that I have a house full of stuff. That makes me reluctant to go out and buy more stuff- like containers to grow tomatoes in. Here is how I made my own, hopefully biodegradable, containers and got my tomatoes started.

material list-

an old cotton T-shirt, size X-Large

some garden fencing that was stuck up in the rafters of the garage, already starting on the biodegrading part- ie rusty.

compost from my compost pile

commercial potting soil

tomato plant

Step 1: Cut the label out of the shirt since it is probably not cotton and wouldn’t decompose.

Step 2: Make a circle shape out of the wire fencing. Mine is about 16 inches across.

Step 3: Place in the garden and push the wire prongs into the soil.

Step 4: Put the t-shirt into the circle, collar edge down. Stretch the bottom edge of the shirt around the top of the fencing. I didn’t worry about weeds underneath- whatever was there will be dead soon.

Now there is a “pot”!

Step 5: Fill it half way with compost or other clean filler dirt, like all last years window boxes that you are replanting. I used compost from my compost pile. Push and stretch out the sides of the t-shirt as you add dirt.

Step 6: Center the tomato plant on top of the compost. Loosen up the root ball.

Step 7: Use the commercial potting soil to fill in around the plant and up to an inch or so from the top. Yes, you are burying 6 inches of stem and leaves. Trust me, that is a good thing. Water thoroughly.

Step 8: Wait 2 months. Hopefully, tomatoes!

I’ve got 4 done. One more to go.

a new bag

another trip, another bag!img_8429.jpg

I even added one of my printed patches to the pocket.  This bag is to put my computer and my other bag into.  Last trip, I didn’t take the computer and my regular bag isn’t big enough to hold it comfortably.  I am not going to leave it home this time though… I really missed it when I went to London.

The fabric was given to me by my niece, an interior architect.  Thanks Laurel!  I absolutely love it!

So, now that the update is finished and I can stop stressing about that, I’ve moved on to stressing about my trip to Portland, Oregon.  Not too much really- it is just that it is such a long travel time.  I am trying to figure out books and projects to bring.  I am hoping to meet up with some fellow artist/crafters … if you are interested, email me or leave a comment.

quilt- 30 years old

36quilt.jpg

This is the first quilt that I made that I considered a success- I was happy with the design and function.  I made it in 1978, 30 years ago.  The top and bottom edges were originally navy and white stripe.  I also used that fabric in the dark areas.  The design has changed because of how it faded but not ruined.  I used another stripe fabric from an old dress that has completely disintegrated.  This quilt has seen a lot of use and it is stained, torn, all around pretty ratty.  If I get inspired to make another quilt, I might use this design as a starting place.  I’m going to put this photo onto flickr so you can see it big if you are interested.

a new bag

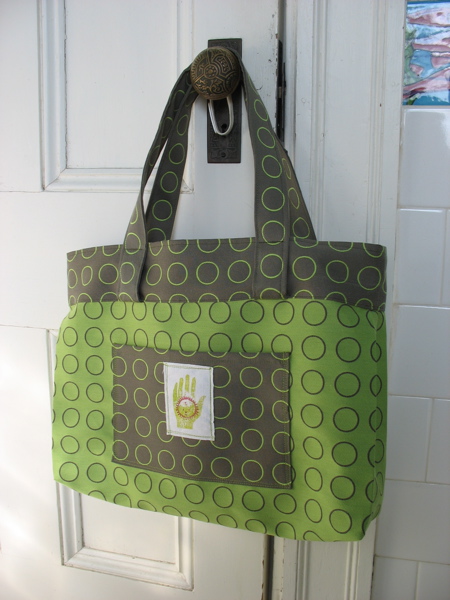
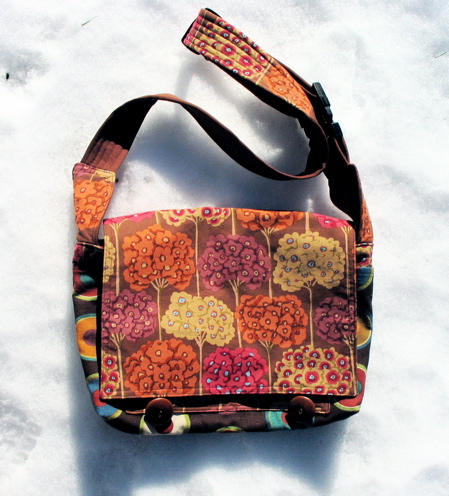
My new bag is done- another messenger/ schoolbag design. The last one I made was looking very worn out indeed. This is a very similar design. The changes- slightly bigger, longer and adjustable strap, slightly different pocket configuration, button closures.

I took these photos with the bag empty. The front-

214bag.jpg

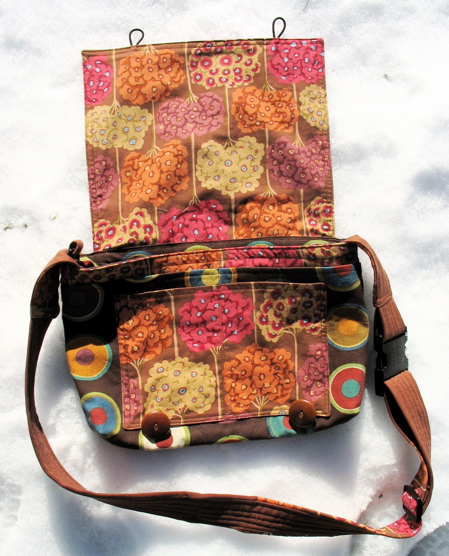
You can see that I found my left-over pieces from the first bag and have used them up. With the flap up- 2 layers of pockets in the front.
214bag2.jpg

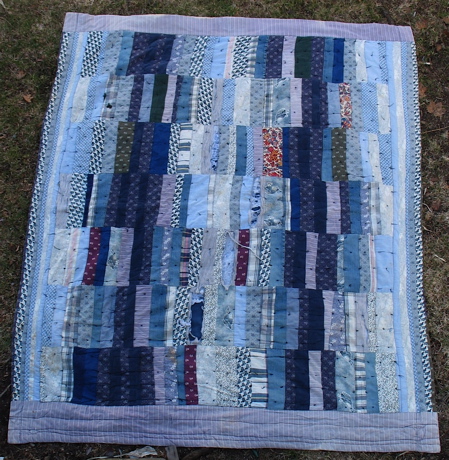
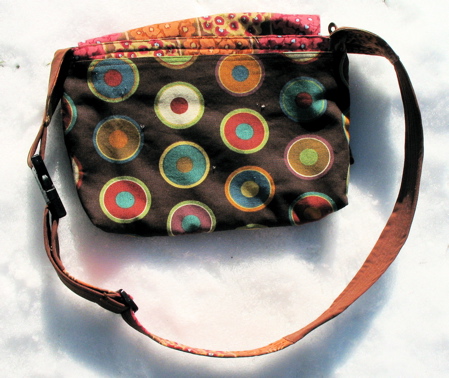
The back- more of the old fabric. A large slip-in pocket in the back.
214bagback.jpg

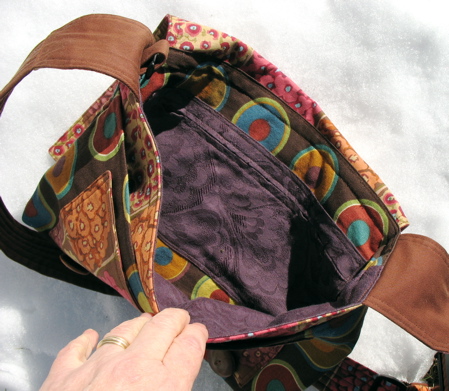
It is a real mish-mash of colors and fabrics. The purple on the inside is a home decorating fabric sample. The brown is cotton twill from a pair of pants. I recycled the hardware from an old schoolbag.
214inside.jpg

I’ve put my stuff into it. It seems so roomy now … but that won’t last long, I’m sure.

Onto other news. First- Happy Valentines Day everyone! And Happy 4th blog birthday to me! That was yesterday actually. I am constantly amazed at the wonderfulness of the internet. I am looking forward to another great year!

I AM going to London- the tickets are purchased and the hotel is booked. I am tagging along on a business trip. If anyone wants to meet up, I will be there from Wednesday through Sunday. I can bring freezer paper as a bribe!

The trip has meant a bit of reshuffling of schedules and as a result, on Tuesday, my son and I drove up to Portland, Maine. We went to visit the Maine College of Art. I love visiting these art schools. It is so much fun to see what is being created, all the tools and equipment, the amazing studios. And it surprises me that mostly I have no desire to go there anymore- I have so much in my head that going back to school would be a huge distraction… even if it would be fun to play with the toys- hee hee! It was fun to see Portland too. It is only 2 hours away but I have never been there before. They seem to have an exciting, thriving art scene. I think it would be a great place to go to Art School. We will see.

On the drive up, an entire thermos of coffee managed to leak out into the bag with my computer. Of course I spent the whole visit with a niggling worry that I had fried my computer. I brought it home for Ben to look at. Not too terribly bad. Now, two days later, I have an odd splotchy pattern on the left side of my screen- not so awful, except when I am trying to look at photos… which is, of course, what I do a lot of.  Hmm.  Maybe we will take it to the MacHospital while we are away…

another scrappy cashmere scarf-

this time for me! With a trip to London looking very likely now, I figured I needed to do some wardrobe enhancement.
29scarf2.jpg

29scarf1.jpg

I’d been meaning to make this for a few weeks. I made the big decision of what colors to use and laid it out for a general idea more then a week ago- and then it just sat there-

29scarf3.jpg

When I heard the news about a possible trip, that was the push I needed and I put it together yesterday. I got some input from Eleanor since she has been wearing her scarf for more then a month now. She suggested that I make it wider. This one is about 14 1/2 inches wide. I put a lettuce edge on it. People think it is hard to do, but really it couldn’t be easier. I do a zigzag stitch around the edge- that is it. The zigzag stitch stretches the knit just enough to give it a ripple effect. What would really be hard would be to put a zigzag edging on a stretchy fabric and not have the waves.

Now I need to make myself a new bag!  Back to the drawing board…